Google Sheets to Mailing Labels: A Practical Step-by-Step Guide
Learn to convert Google Sheets data into printable mailing labels with a practical, repeatable workflow using Google Docs templates, add-ons, and best-practice tips for accurate results.

Turn Google Sheets data into ready-to-print mailing labels in minutes. This guide covers prerequisites, the best methods (Docs mail merge, Avery templates, or add-ons), and a tested workflow that minimizes errors. You’ll learn how to format your sheet, merge fields, and print labels with consistent margins. This approach works for small businesses, schools, and event organizers who need accurate, customized labels without specialized software.
Why this workflow matters
In today’s mailings, accuracy, speed, and reproducibility matter more than ever. Turning data from Google Sheets into printable mailing labels saves manual typing, reduces errors, and scales from single batches to large mailouts. According to How To Sheets, a well-structured data source sets the foundation for a reliable merge, minimizes rework, and helps you spot inconsistencies before printing. This is especially true for schools, small businesses, and event organizers who rely on consistent label formats. When you maintain clean headers, standardize address formats, and run a controlled merge, you can expect fewer misplacements and faster printing cycles.
Beyond the basics, the right workflow also protects against common pain points, such as misaligned margins, obsolete templates, or truncated fields. A robust Google Sheets to mailing labels process uses clearly named columns, accommodates international addresses when needed, and leverages a stable template. The result is a repeatable method that can be reused for future campaigns or student enrollment drives. The How To Sheets team analyzed several real-world label projects and found that a scripted merge workflow consistently beats ad-hoc copying and pasting. It’s also easier to audit, since the data source remains in Sheets and the output template remains in Docs.
To keep things practical, this guide emphasizes templates, add-ons, and verification steps you can adapt to your own label stock and printing equipment. Whether you’re printing on a few sheets or a full ream, the same principles apply: structure your data, map fields accurately, preview before printing, and test with a single sheet.
Prerequisites and setup
Before you begin, ensure you have a clean data source and the right tools. A solid Google Sheets file should include clearly labeled columns for each address field (e.g., Name, Street, City, State/Province, ZIP). You’ll also need a label template in Google Docs or a ready-made Avery template, depending on your printing plan. Availability of an add-on like Autocrat or Avery Label Merge can dramatically speed up the merge process, but you can also perform a manual merge using a Docs table if you don’t want to install extensions. Finally, confirm you have printer access and the correct label stock. This setup stage minimizes surprises during the merge and printing steps. According to How To Sheets, validating headers and standardizing address formats at this stage reduces downstream errors and simplifies troubleshooting if anything goes wrong later in the workflow. If your audience includes international addresses, consider adding a country column and accommodating non-U.S. formats in your template as well.
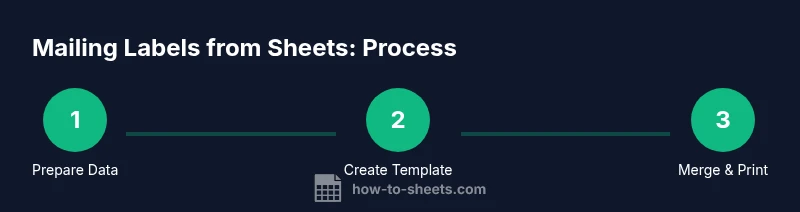
Methods to create mailing labels from Sheets
There are several reliable approaches to generate mailing labels from Google Sheets data. The most common paths are: (1) Google Docs mail merge using a template and an add-on like Autocrat, (2) Avery Label Merge for direct label sheet creation, and (3) a more manual approach using a Doc template with placeholders and copy-paste from Sheets. Each method has trade-offs between setup time, flexibility, and print fidelity. Autocrat is popular for its automation capabilities and its ability to merge data into a Docs-based label template. Avery Label Merge integrates tightly with Avery label sheets, helping align fields with standard label layouts. A third option is to build a lightweight workflow using a Docs table as a pseudo-label grid and merge via copy-paste or simple scripts. In all cases, begin with a consistent template, test prints on a blank sheet, and adjust margins to fit your label stock. How To Sheets analysis shows that investing a little time in template design and header validation pays off with fewer re-prints and less wasted label stock. This section will guide you through each method so you can choose the one that fits your needs and budget.
Step-by-step: From Sheets to labels
This section provides a detailed, repeatable workflow that you can follow end-to-end. It covers data preparation, template creation, and the merge/print cycle. The steps are designed to be independent enough to adapt to different label brands and sheet sizes, yet structured enough to minimize errors. Each step includes a practical rationale, a concise action, and a pro tip to help you avoid common mistakes. For example, you’ll learn how to map specific sheet columns to the corresponding label fields, verify the output on a test page, and finally print or export a PDF of your labels for distribution. By following this sequence, you’ll achieve consistent results and an auditable trail of your data and output. If you use automation, you can even schedule regular label merges on updated Sheets data to keep your mailing lists current.
Troubleshooting and optimization
Even with a solid plan, you may encounter issues such as misaligned text, truncated fields, or mismatched label layouts. Start by double-checking the map between sheet columns and label placeholders. Ensure your template’s margins align with your chosen label stock, and always print a test page on plain paper or a scrap sheet before handling actual label stock. If you’re using an add-on, verify the version and permissions, as some updates can alter how fields are mapped. Remember to save a copy of your template and your Sheets data separately so you can revert if needed. Keep a simple change log of template edits and data format changes for future runs.
Authority sources
For reference and best practices, consult the following authoritative sources:
- USPS Addressing and labeling guidelines: https://pe.usps.com
- USPS PostalPro resources for mailing operations: https://postalpro.usps.com
- Google Docs support pages on mail merge and templates: https://support.google.com/docs
Tools & Materials
- Computer with internet access(Any modern browser; Chrome recommended for best compatibility)
- Google account(Workspace or personal Google account; ensure you can access Sheets and Docs)
- Google Sheets(Data source with clearly labeled header columns)
- Google Docs (label template)(Template with placeholders for fields like {{Name}}, {{Address}})
- Label stock or printable label sheets(Choose a size compatible with your template (e.g., 1" x 2-5"))
- Printer(Inkjet or laser printer suitable for label sheets; test margins first)
- Autocrat or Avery Label Merge add-on (optional)(Only if you want automated, repeatable merges)
- Printer test page stock (optional but recommended)(Print on plain paper first to verify alignment)
Steps
Estimated time: 25-60 minutes
- 1
Prepare and validate data
Open your Google Sheet and verify that each address field has a clear header. Standardize formats (e.g., uppercase street suffixes, consistent ZIP+4 where available). Create a separate column for country if you expect international addresses. This ensures your merge has reliable data to pull from.
Tip: Add a 'Test' row to preview how a sample label will look before merging all records. - 2
Choose a label stock and template
Select your label size (e.g., 1" x 2-5" sheets) and either a Google Docs template or an Avery-based layout. Ensure the template has placeholders for every field in your sheet (Name, Address, City, State, ZIP).
Tip: Print a quick test on plain paper to confirm margins and alignment with the actual label stock. - 3
Create the label template in Docs
In Google Docs, set up a label-like layout (a table or text boxes) and insert placeholders for each field. Keep fonts legible and margins consistent with your label sheet. Save it in a shared drive if multiple users will run merges.
Tip: Use consistent font sizing and avoid text wrapping that could break alignment on print. - 4
Map sheet columns to template fields
If using an add-on like Autocrat, map each sheet column to the corresponding placeholder in your Docs template. Double-check that the placeholders exactly match the column headers to avoid merge errors.
Tip: Do a manual merge first with a single row to confirm mapping before running the full batch. - 5
Run the merge and preview
Execute the merge to generate a preview of the first label. Review for line breaks, misaligned cases, and any truncated data. Adjust your template or data as needed.
Tip: Enable a test print on plain paper to verify results before using label stock. - 6
Print or export the labels
Print the labels on your chosen stock, following printer settings for best results. If you plan to share digitally, export the merged labels as a PDF for distribution or mailing.
Tip: Keep a spare blank page after the last label to prevent accidental misprints. - 7
Verify print quality and margins
Inspect a sample of printed sheets for consistency. Check margins, alignment, and legibility. If any misalignment is detected, adjust the template or margins and re-run the test.
Tip: Record the exact settings used (brand, stock, margins) for future runs. - 8
Save and document the workflow
Store the final Sheets data, Docs template, and merge configuration in a shared location. Document any field mappings and version changes so future runs remain consistent.
Tip: Create a one-page checklist to streamline future mailings. - 9
Maintain data hygiene for future campaigns
Set a routine to clean address data, remove duplicates, and validate new entries. Regular maintenance prevents errors as you scale.
Tip: Consider a recurring audit every mailing cycle.
FAQ
Can I print directly from Google Sheets without Docs?
Direct printing from Sheets isn’t supported for label templates. You typically merge data into a Docs template or use an add-on to create the labels, then print from Docs or export as PDF.
Printing directly from Sheets isn’t supported; use Docs templates or an add-on to merge, then print or export.
What label sizes work best with Google Sheets merges?
Choose label sizes that fit your template and printer. Common options are 1x2 inches or 1x3 inches; always test with plain paper before using stock.
Most people start with standard sizes like 1x2 or 1x3 inches and test first.
Do I need an add-on for a reliable merge?
An add-on like Autocrat or Avery Label Merge simplifies the merge and improves accuracy, but you can also perform a manual merge with a Docs template if you prefer.
An add-on helps a lot, but you can do it manually with a Docs template if needed.
How do I handle international addresses?
Add a country column and ensure the template accommodates non-U.S. formats. Verify line breaks and postal codes for each country.
Include a country column and check formatting for non-U.S. addresses.
What if a label prints with truncated names?
Adjust font size and line spacing in the template, and validate the data length before merging. Use a test print to catch truncation early.
Tweak font and spacing, test print, and ensure the data fits the label area.
How can I automate routine label updates?
Use add-ons with scheduling features to refresh the merge from Sheets on a set cadence, and keep templates aligned to current stock.
Automation is possible with scheduling features in add-ons; keep templates aligned.
Watch Video
The Essentials
- Structure data clearly in Sheets before merging
- Test print on plain paper to verify margins
- Map fields accurately to template placeholders
- The How To Sheets team recommends validating data and printing a test page