Create a Sample Google Sheets Invoice: Step-by-Step Template
Learn to build a clean, reusable sample Google Sheets invoice with formulas, professional formatting, and time-saving tips ideal for client billing workflows.

By the end you’ll have a ready-to-use sample Google Sheets invoice template with header, client details, itemized line items, and a total section. You’ll learn essential formulas, currency formatting, and how to export or share the invoice. This guide assumes you have a Google account and access to Google Sheets.
What is a sample google sheets invoice?
According to How To Sheets, a sample Google Sheets invoice is a ready-to-use layout you can reuse across clients. It typically includes your business name, contact details, client information, an invoice date, an invoice number, and a line-items section with descriptions, quantities, unit prices, and a calculated total. The beauty of this approach is speed, standardization, and convenient sharing via Google Drive. For students, professionals, and small business owners who bill monthly or per project, a well-crafted sample invoice provides a consistent, professional look and minimizes data-entry errors. You’ll often see sections for terms, due date, and payment methods, all designed to be filled quickly without reinventing the wheel every time. This setup also supports easy collaboration with teammates, since multiple people can view or edit the same document in real time. In practice, a solid sample invoice acts as a starting point, which you can tailor to individual clients while keeping the core structure intact. By using this template approach, you reduce repetitive work and free up time for higher-value tasks such as client communications and project management.
Why start from a template?
Templates deliver efficiency and accuracy. A well-designed sample invoice template fixes the header area, client data, line items, tax and totals in a single structure, so you don’t forget essential fields. How To Sheets analysis shows templates help teams reduce errors and save time by reusing the same structure across clients. With a template, you can customize client names, items, tax rates, and currency while preserving a polished, professional appearance. It also makes sharing and exporting straightforward, since the layout remains consistent even as you adjust values. Adopting templates supports a scalable workflow, especially for agencies, freelancers, or accounting teams that process multiple invoices each week. Over time, you can develop a library of templates tailored to different services or client types, further shortening your billing cycles. The goal is a reliable, repeatable process that produces clear, accurate invoices with minimal manual intervention.
Step-by-step: Build your sample invoice in Google Sheets
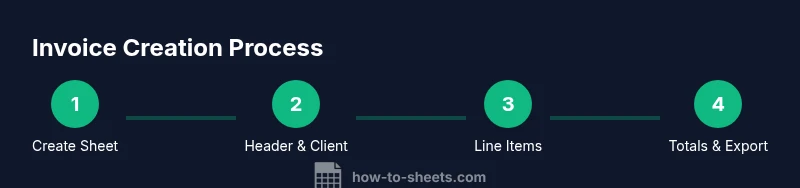
The following approach keeps the process clear while you learn the core pieces. Start by creating a header area with your business name and contact details, followed by a client information section (name, company, address). Then add a clean line-items table with columns for Description, Quantity, Unit Price, and Line Total. Finally, place a totals area that computes Subtotal, Tax, Discounts, and Grand Total. As you build, consider naming cells for totals so formulas stay readable. Use data validation to prevent negative quantities and to enforce a consistent currency display. This section is designed so a beginner can complete the set-up in about 20–30 minutes, depending on how much customization you pursue. If you anticipate more complex needs, such as multiple tax rates or international currencies, plan to expand the template in a separate sheet while preserving the core structure. Remember, the goal is a reusable, error-resistant invoice that you can clone for each client.
Practical formulas and calculations
Use a simple, robust setup to keep the sheet fast and reliable. Each line item uses: Description (text), Quantity (number), Unit Price (currency), and Line Total (Quantity × Unit Price). A running Subtotal sums all line totals with =SUM(LineTotalRange). Taxes can be calculated with a dedicated Tax Rate cell and an expression like =Subtotal×TaxRate, or use a separate Tax column. The Grand Total combines Subtotal, Tax, and any Discounts: =Subtotal + Tax − Discount. For currency formatting, set the locale to match your currency and apply the currency format to relevant cells. You can also wrap numbers with ROUND for cleaner presentation. These practices help ensure accuracy even as you add or remove line items. If you expect frequent changes, consider using named ranges and dynamic ranges so totals update automatically as you insert new lines. Finally, document any assumptions (tax rules, discounts, or fees) so colleagues can follow the same logic when reviewing the invoice.
Best practices for professional invoices
Keep the invoice visually clean with generous white space, readable fonts, and consistent alignment. Include a clear due date, payment terms, and preferred payment methods. Save the sheet as a reusable template, then export to PDF for sending to clients. Before sending, double-check client details and totals, and consider adding a simple status field (Draft, Sent, Paid) to track workflow. Finally, store templates in a dedicated drive folder so you can locate and reuse them quickly when new projects arise. To maintain a professional image, include a brief notes section for late-payment terms or project-specific reminders. If you’re collaborating with others, enable comment-only access on the non-editable sections to prevent accidental changes while still gathering feedback. By following these practices, you’ll deliver consistent, high-quality invoices that support smooth payment cycles.
Tools & Materials
- Google account with Sheets access(Open Google Drive and sign in to create or edit invoices)
- Blank Google Sheet or invoice template(Create a new document named 'Invoice Template' or clone an existing one)
- Internet connection(Stable connection to use Google Sheets and Drive)
- Printer or PDF export capability(Optional for sending physical copies or PDFs)
Steps
Estimated time: 20-30 minutes
- 1
Create a new invoice sheet
Open Google Sheets and start a new document. Set up a simple header area for your business name and contact details, then add a dedicated client information section. This establishes the basic structure you’ll reuse for every client. Pro tip: keep the header in a separate, clearly labeled section to minimize mistakes when you copy the sheet for new invoices.
Tip: Use a separate header sheet or merged cells to keep the header distinct from line-item data. - 2
Set up header and client sections
Enter fields for Client Name, Client Company, Address, Invoice Date, and Invoice Number. Use a consistent format for dates and a unique, incrementing invoice number. This step creates the metadata that makes the invoice scannable for clients and for accounting records.
Tip: Enable data validation for dates to avoid formatting issues. - 3
Build the line items table
Create columns for Description, Quantity, Unit Price, and Line Total. Leave some rows empty to accommodate future items. Pro tip: keep the first row as headers and freeze it so the labels stay visible as you scroll.
Tip: Use data validation for Quantity to prevent negative numbers and ensure consistent currency display. - 4
Add calculation formulas
Enter formulas to compute Line Total (Quantity × Unit Price) and Subtotal (sum of all Line Totals). Then add Tax, Discount, and Grand Total fields. Validate that the final amount reflects any discounts or taxes applied.
Tip: Use named ranges for Subtotal, Tax, and Grand Total to simplify formulas. - 5
Format for professionalism
Apply currency formatting, adjust column widths, and use borders to separate sections. Use a clean font and consistent alignment. Add terms like due date and payment methods to guide the recipient on how to pay.
Tip: Lock critical cells to avoid accidental edits during collaboration. - 6
Save and test the template
Save the file as a template and create a test invoice by entering sample data. Verify that totals update automatically as you edit line items. Exchange one or two items to ensure the calculations adjust correctly.
Tip: Test with a blank line item to confirm total logic works with zero quantities. - 7
Export or share the invoice
Export the completed invoice as a PDF or share the Google Sheet with clients or teammates. If you export to PDF, review the layout to ensure all sections are legible on standard paper sizes.
Tip: Consider adding a visible due date and payment method on the PDF for clarity.
FAQ
What is a sample Google Sheets invoice?
A pre-built invoice layout in Google Sheets you can reuse for billing different clients. It includes header, client details, line items, totals, and payment terms to streamline processes.
A ready-made invoice layout you can reuse for multiple clients.
Can I customize taxes and discounts in the template?
Yes. You can adjust tax rates and discounts using simple formulas and dedicated cells so totals update automatically.
Yes, you can adjust tax rates and discounts with basic formulas.
How do I share or export the invoice?
Share the Google Sheet with collaborators or export the finished invoice as a PDF for sending to clients.
Share the sheet or export as PDF.
Is using a template compliant with professional standards?
Templates help ensure required fields and consistent formatting, which aligns with common invoicing standards when used correctly.
Templates help ensure consistency and compliance when used properly.
What about multiple currencies?
Set the currency format for the sheet and adjust the Unit Price cell as needed; for multi-currency invoices you may add a separate currency section.
Format currency per sheet and adjust as needed.
How can I reset for a new client?
Make a copy of the template, clear the line item data, and update client details before reuse.
Copy the template and update client details.
Watch Video
The Essentials
- Create a reusable Google Sheets invoice template.
- Automate totals with simple functions (SUM, multipliers).
- Format professionally and export as PDF for clients.
- Keep client data secure and templates organized in Drive.
- Save as a template for repeated use across projects.