Google Sheets with Outlook Email: A Practical How-To
Learn how to automate Outlook emails from data in Google Sheets using Power Automate or Apps Script. This step-by-step guide covers prerequisites, setup, templates, security, and best practices for students, professionals, and small businesses.

This concise guide shows how to automate sending Outlook emails from data in Google Sheets. You’ll learn the two main methods (Power Automate and Apps Script), the prerequisites, and common pitfalls. By the end, you’ll have a reliable flow that personalizes messages and reduces manual work. This approach suits students, professionals, and small business owners who need scalable mail automation.
Overview: Why google sheets with outlook email matters
In today’s professional environment, bridging google sheets with outlook email enables data-driven communications without manual copy-paste. When teams maintain a single source of truth in Sheets, they can trigger personalized messages, reminders, and status updates directly from a sheet. This reduces errors, saves time, and helps teams stay aligned. According to How To Sheets, practical automation turns repetitive tasks into repeatable, auditable workflows that scale with your requirements.
This section sets the stage for practical, repeatable automation. You’ll learn why this integration is valuable for students, professionals, and small business owners who manage contact lists, project updates, or customer communications from a shared data source.
How the integration works: data flow and options
The core idea is simple: a trigger detects changes or a schedule in Google Sheets, an automation service fetches the relevant row data, and an outbound email is composed via Outlook with the mapped Subject and Body fields. There are multiple ways to implement this: (1) Power Automate with a Google Sheets connector, (2) Google Apps Script that calls the Microsoft Graph API, (3) third-party automation platforms that bridge Sheets and Outlook. Each approach has trade-offs in terms of coding effort, latency, and security management. The How To Sheets team notes that for most users, Power Automate offers the fastest path with a low learning curve, while Apps Script provides deeper customization if you need complex data transformations.
Understanding these data flows helps you select the right tool for your environment and data governance requirements.
Prerequisites and authentication
Before you start, ensure you have an active Google account with access to the spreadsheet and a valid Microsoft 365 / Outlook account. You’ll also need permission to send emails via the chosen method (Power Automate, Apps Script, or a direct Graph API call). Set up secure connections using OAuth rather than hard-coding credentials. If you use Power Automate, create a connection to Google Sheets and another to Outlook; if you opt for Apps Script, enable the appropriate services and consider using libraries that handle OAuth flow. How To Sheets emphasizes using permission-scoped connections to minimize security risks.
This section helps you establish trust in the automation path by focusing on secure, auditable connections from day one.
Methods to connect: Power Automate, Apps Script, and connectors
Power Automate provides a visual builder to define triggers (e.g., when a new row is added) and actions (send an Outlook email). This path requires minimal coding and offers robust error handling, retry policies, and auditing. Apps Script allows you to craft custom mapping logic, format email bodies with dynamic fields, and store templates in the sheet or a Google Drive file. Third-party connectors can simplify cross-platform workflows, but check vendor security and data-sharing terms. The How To Sheets analysis shows that many teams start with Power Automate for speed and switch to Apps Script when they need more control.
Choosing between these options depends on your team’s coding comfort, governance policies, and the need for custom logic. This section outlines practical decision criteria to help you pick the right approach for your use case.
Use case: sending automatic emails from a Google Sheet with Outlook
A common scenario is a weekly status report: a sheet includes Recipient Email, Subject, Body Template, and a Send Date column. When the flow runs, it fills in recipient-specific fields (like name and project) and sends a personalized email via Outlook. You can also attach files from Drive, or include calendar invites by generating .ics attachments. The example below outlines a minimal viable sheet and a corresponding flow to illustrate the pattern.
This section helps you envision how the automation will look in practice, with concrete field mappings and example data rows.
Step-by-step example: set up a simple workflow
This example walks through a basic setup you can replicate. You’ll define the sheet structure, create a Power Automate flow, map fields, and test with a sandbox mailbox. As you progress, you’ll add optional attachments and simple error handling. The goal is a functional MVP you can extend.
Step-by-step walkthroughs reduce ambiguity and give you repeatable templates for future projects.
Troubleshooting common issues
Common issues include authentication failures, mis-mapped fields, and rate-limits on sending emails. Start by checking connections, then verify that column headers exactly match your mapping. Review the run history in your automation tool to identify where data is missing or formatted incorrectly. If emails fail due to blocked addresses, confirm recipient consent and policy compliance.
Proactive logging and a clear rollback plan help keep outages from becoming customer-visible problems.
Security and compliance considerations
Automating email from Sheets touches sensitive data (names, emails, personal details). Use OAuth-based connections, limit data exposure, and implement access controls so only authorized users can view or edit the sheet. Maintain an audit trail of who created or modified the workflow, and consider data retention policies for email content. Do not hard-code credentials or store secrets in plain text.
These practices protect both individuals and organizations while enabling scalable automation.
Data validation, auditing, and reliability
Add data validation in Sheets to prevent invalid email addresses or malformed subjects from entering the flow. Use flow-level validations and retry policies to handle transient failures. Maintain a versioned template for emails, and log each run with a timestamp, recipient, and status. Regularly review logs to identify recurring issues and adjust mappings accordingly.
This block emphasizes reliability and traceability in production workflows.
Templates and sample sheet layout
A clean sheet layout makes automation easier to maintain. Recommended columns include: Email, FirstName, LastName, SubjectTemplate, BodyTemplate, SendDate, IncludeAttachments, AttachmentPaths. Keep templates in a separate tab or file to simplify updates. Use placeholders ({{FirstName}}, {{Project}}) and replace them programmatically before sending.
A well-structured sheet reduces maintenance time and helps new teammates get up to speed quickly.
Scheduling, monitoring, and scaling for teams
For teams, consider centralized governance: a single Flow with per-row data, or multiple flows scoped to departments. Scheduling can be time-based (e.g., every Monday at 9 AM) or event-based (on date column changes). Monitor dashboards should show volume, success rate, and any errors, enabling rapid remediation as you scale.
This section outlines practical approaches to keep the system resilient as usage grows.
Authority sources
For deeper dives, consult official documentation from Microsoft and Google: https://learn.microsoft.com/en-us/power-automate/ and https://developers.google.com/apps-script. These sources provide current APIs, best practices, and security guidance relevant to any Sheets-to-Outlook automation. Additional reference: https://support.google.com/mail/answer/6589 for user-facing emailing concepts.
Next steps and best practices
Consolidate your learning by building a small project with a single recipient list, then expand to multi-recipient scenarios. Create templates for common messages, document mappings, and establish a quarterly review of access permissions and logs. Keep users informed about automation changes and ensure you stay aligned with organizational data policies.
Tools & Materials
- Google account with Sheets access(A sheet containing recipient data (email, subject, body))
- Microsoft 365 / Outlook account(Outlook web or desktop app; permissions to send emails)
- Power Automate access(Plan that includes Flow creation)
- Optional: Google Apps Script editor(If choosing script-based approach)
- Shared Google Sheet or dataset(With columns: Email, Subject, Body, Attachments (optional))
- Test data (dummy recipients)(For dry runs before live sending)
Steps
Estimated time: 60-180 minutes
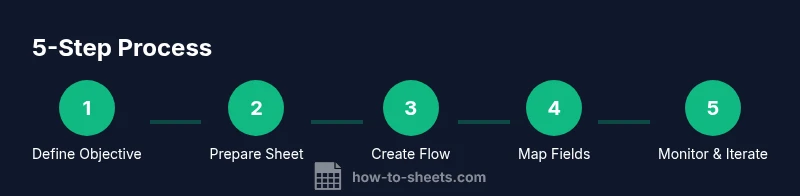
- 1
Define your objective
Clarify what will trigger emails, what data fields you need, and what the message should include. This prevents scope creep and ensures you map the right columns in Sheets.
Tip: Write a one-sentence success criterion for the workflow. - 2
Prepare your sheet layout
Create a sheet with clearly labeled columns for Email, Subject, Body, SendDate, and any placeholders you’ll fill in at send time. Use data validation to ensure valid emails and dates.
Tip: Keep header names consistent with your flow mappings. - 3
Create a new Flow in Power Automate
Start a new flow and choose the Google Sheets connector as the trigger source. Select the event that signals when to check the sheet (e.g., new row or updated row).
Tip: Use a test sheet to avoid sending real emails during setup. - 4
Add Outlook action to send mail
Add an action to send an email via Outlook (Office 365). Map the To, Subject, and Body fields to the corresponding sheet columns. Include error handling steps if the email fails.
Tip: Use dynamic content to personalize each message. - 5
Map data fields from Sheets to email fields
Configure the flow so that each column in the sheet feeds the matching field in the email. Consider placeholders for personalization (e.g., {{FirstName}}).
Tip: Preview mappings with a small test row. - 6
Test with a sandbox mailbox
Run the flow using a test recipient mailbox and verify formatting, attachments, and delivery. Check dashboards and error logs to identify issues.
Tip: Start with 1-2 test emails before scaling. - 7
Add error handling and retries
Configure retry policies and notifications for failed deliveries. Ensure the flow can continue running even if a single row fails to send.
Tip: Set a maximum retry limit and a separate alert channel. - 8
Set up scheduling or trigger on changes
Decide between a time-based schedule or sheet-change trigger based on your use case. Ensure you’re not exceeding API limits.
Tip: Prefer time-based cadence for batch sends to reduce load. - 9
Monitor, log, and maintain the flow
Create a simple dashboard or log table to track run status, recipient counts, and delivery success. Schedule reviews of mappings and templates.
Tip: Document every change in a changelog. - 10
Scale and iterate
As needs grow, modularize templates, split recipients by department, and consider separate flows for different message types. Regularly audit access and data usage.
Tip: Plan a quarterly review to retire outdated templates.
FAQ
Can I automate emails from Google Sheets to Outlook?
Yes. You can automate emails by connecting Google Sheets data to Outlook using Power Automate or Apps Script.
Yes, you can automate emails by connecting Sheets to Outlook using Power Automate or Apps Script.
Do I need coding experience to set this up?
No. Power Automate offers a visual builder with no-code options, and Apps Script provides templates for common tasks.
No, you can set this up with Power Automate and templates if you prefer not to code.
Are attachments possible in the automated emails?
Yes, you can attach files from Google Drive or other sources, but you may need additional steps to handle file retrieval.
Yes, attachments are possible but may require extra steps to pull files from Drive.
What security considerations should I know?
Use OAuth connections, minimize data exposure, and keep logs for auditing. Avoid embedding credentials in sheets.
Use secure connections and keep logs for auditing to protect data.
Can I schedule emails to send later?
Yes, Power Automate supports delayed sending, and Apps Script can schedule triggers with time-based functions.
Yes, you can schedule emails with Power Automate or Apps Script.
Watch Video
The Essentials
- Map fields carefully from Sheets to email fields.
- Choose a method that matches your coding comfort level.
- Always test with dummy data before live sends.
- Use secure connections and audit trails to protect data.
- Document mappings to ease maintenance and scaling.