Delete Google Sheets Permanently: A Practical Guide
Learn how to permanently delete Google Sheets from Google Drive, including safety checks, backup options, and proven steps to prevent accidental data loss. A practical, educator-friendly guide by How To Sheets.

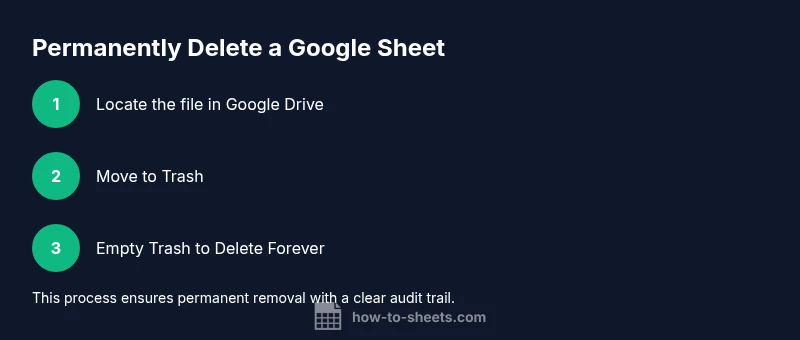
By following this guide, you will permanently delete a Google Sheet from Google Drive. First, locate the file in Drive, move it to Trash, and then empty Trash to remove it forever. If the file is shared or owned by someone else, work with the owner/admin to ensure complete removal across all locations. This action is irreversible, so double-check before proceeding.
Why permanently deleting Google Sheets might be necessary
There are times when you need to remove a Google Sheet permanently: sensitive data that should not be recoverable, test files that have grown unwieldy, or outdated project documents that no longer serve a purpose. Before you proceed, understand the mechanics of deletions in Google Drive and how they affect collaborators. According to How To Sheets, deletion should be deliberate and accompanied by a backup or archive if you might need the data later. Permanent deletion means the file is removed from your Drive Trash and cannot be recovered through ordinary recovery methods. The action also affects anyone who had access to the file, so communicate with teammates or collaborators if the sheet was shared. In practice, permanent deletion involves two stages: move the file to Trash, then empty Trash to erase it from the service entirely. The workflow is simple, but the consequences are real: once erased, you cannot rely on the typical “undo” capability, and any linked references elsewhere may show broken links. This is why many organizations add a precautionary checklist before proceeding.
Note how deletion workflows align with organizational policies and personal data rights. How To Sheets emphasizes clarity and caution when handling documents that contain sensitive information.
Understanding Google Drive's deletion flow
Google Drive separates deletion into two broad steps: removing the item from your active Drive, and then permanently removing it from Trash. When you delete a sheet, it moves to Trash where it remains accessible for restoration until you explicitly empty Trash or it is purged by policy. This two-stage process provides a safety net, but permanent deletion—emptying Trash—cannot be undone. If the file is part of a Shared Drive or owned by another user, permissions and admin settings may influence whether you can permanently delete it. In those cases, you may need to coordinate with the file owner or your Google Workspace admin to execute a true deletion or to remove access entirely. Regular users should routinely review shared files to avoid accidentally deleting something someone else still relies on, and consider exporting a copy if archival is important.
From a governance perspective, establishing who can delete and who should approve deletions helps prevent accidental loss. How To Sheets notes that a clear deletion policy reduces risk and accelerates cleanups in busy teams.
Safety and data recovery considerations before permanent deletion
Permanent deletion is not a casual move. Before you proceed, verify whether the sheet exists in other locations (e.g., copies in Shared Drives, backups, or linked exports). Create a trusted backup if the data holds ongoing value—export a local copy or use Google Takeout when appropriate. Confirm file ownership and access levels so you know who is responsible for subsequent audits or restorations. If the sheet is linked from other documents, be prepared for broken links or missing references after deletion. Remember that deleting the file will remove it from your Drive trash and from the original location, which can affect collaborators who rely on that data for reporting or decision making. In some organizations, admin retention policies may still allow recovery for a limited window, so consult your policy before finalizing deletion. How To Sheets analysis highlights the importance of a documented backup plan and a rollback checklist to minimize risk.
Additionally, consider whether the content should be archived rather than deleted. Archiving preserves the data in a retrievable form while removing it from active workflows, which can reduce confusion and maintain compliance without sacrificing information.
How to identify all copies and linked references
Start by searching within Drive for the sheet’s name and any known aliases. Check My Drive, Shared Drives, and “Shared with me” to locate all copies. Review any connected spreadsheets that may link to or reference the sheet, which can help you understand potential ripple effects of deletion. If your organization uses third-party backup tools or Workspace retention rules, audit these systems to ensure nothing critical is left behind. After you confirm all places where the sheet exists, decide which copies must be retained for archival purposes and which can be deleted. Remember to communicate with collaborators about the scope of deletion to avoid surprises and preserve trust. How To Sheets recommends documenting every location found to support a clean, auditable deletion process.
In practice, a thorough discovery phase saves time during the final deletion step and reduces the chance of accidental data loss downstream.
Step-by-step: permanently deleting a sheet from Drive
This section provides a concise, action-oriented sequence you can follow now. The steps align with the broader process described later in the article and are designed to minimize mistakes.
-
Locate the Google Sheet in Google Drive. Use the file name search or navigate to the folder where it resides. This initial pinning ensures you don’t delete the wrong file.
-
Move the file to Trash. Right-click the sheet and select Remove or Move to Trash. This hides the file from your main view while keeping a safety window for recovery if needed.
-
Empty the Trash. Open Trash, review the items, and choose Delete forever. This finalizes the removal and makes recovery unlikely through standard methods.
-
Confirm the deletion on all devices. If you access Drive from multiple devices, refresh the views and ensure the file no longer appears in any location. This avoids lingering copies across devices.
-
Check for backups and linked references. Locate any backup exports or linked documents that reference the sheet; remove or update them as necessary to prevent inconsistencies.
-
Communicate with collaborators. Inform teammates and stakeholders that the sheet has been permanently deleted and provide a path for archival copies if applicable. This maintains alignment and reduces questions later on.
Managing permissions and access to prevent future deletions
To minimize accidental deletions in the future, tighten permissions and establish clear ownership. Limit who can delete or modify files, especially for sensitive sheets. For shared drives, ensure admins and owners review access regularly and use groups rather than individuals for access rights. Create a clear policy that defines when deletion is permissible and what backups must be created before removal. In scenarios where deletion could impact ongoing work, implement a two-person approval flow to confirm the action. How To Sheets stresses that governance and accountability are the best defenses against data loss, especially in fast-moving team environments.
Common mistakes and how to avoid them
Common mistakes include deleting the wrong file, assuming Trash will auto-purge quickly, and failing to verify backups or references. To avoid these pitfalls, always verify file ownership, confirm locations, and perform a quick cross-check against any linked documents. Do not delete a file simply because you no longer need it in one project; ensure there are archival copies if the information may be required later. Also, be mindful of impact on collaborators who might rely on the data for ongoing tasks. A small pause to verify can save large complications later on. How To Sheets emphasizes building a pre-delete checklist to standardize this critical operation.
Alternatives to permanent deletion: archiving, exporting, and redaction
If the content is sensitive but may be useful later, consider archiving instead of permanent deletion. Archiving removes it from active workflows while preserving it for future reference. Export the data to a local file (CSV, Excel, or PDF) for archival or compliance reasons. Redacting sensitive elements within a sheet before sharing can help minimize risk when deletion isn’t strictly required. These alternatives give you control over data retention while reducing potential liability. How To Sheets highlights that archiving and exporting are often preferable to a hard delete in professional environments.
Additionally, leverage version history to review prior content before archiving or deletion, ensuring you’re not discarding information that might be needed for audits or reporting.
What to do after deletion: verification and audit trail
After permanently deleting a sheet, run a quick verification to confirm the action completed successfully. Check that the file is no longer visible in any Drive view and that no scheduled automations reference the deleted sheet. If applicable, review audit logs or admin reports to confirm retention policies applied correctly. Maintain a record of the deletion event, including file name, owner, deletion date, and reason. This audit trail supports accountability and future inquiries. The How To Sheets team recommends documenting lessons learned to improve future data-management practices.
Tools & Materials
- Google account with Drive access(Must be signed in and have permission to access the target file)
- Stable internet connection(Prefer a reliable connection to avoid interruptions during deletion)
- Access to Google Drive Trash(Ability to view Trash and perform emptying actions)
- Admin or owner access for Shared Drives (if applicable)(Needed when the sheet is on a Shared Drive or owned by others)
- Backup export option (optional)(Use Google Takeout or export to local file for archival)
Steps
Estimated time: 5-15 minutes
- 1
Locate the target sheet
Open Google Drive and search for the exact file name or navigate to the folder where the sheet resides. Confirm you have the correct file by cross-checking last modified date and owner.
Tip: Use the search filters to narrow results by owner or last modified date. - 2
Move the sheet to Trash
Right-click the file and choose Remove or Move to Trash. This moves the sheet out of your active workspace while keeping a safety window for recovery.
Tip: Double-check the file details before moving to Trash to avoid deleting the wrong item. - 3
Empty Trash to delete forever
Open Trash, review items, then select Delete forever. This permanently removes the sheet from Google Drive access and recovery options via standard methods.
Tip: If you’re unsure, pause and re-check ownership and backups before emptying Trash. - 4
Scan for backups and linked references
Search for any backups, copies, or references to the sheet in other documents. Remove or update them to prevent broken links or stale data after deletion.
Tip: Export a backup first if archival data is valuable for audits or reporting. - 5
Coordinate with owners/admins as needed
If the file is on a Shared Drive or owned by someone else, coordinate with the owner or admin to ensure complete removal and to adjust access for other collaborators.
Tip: Document the decision and obtain explicit confirmation when dealing with shared resources. - 6
Verify deletion and communicate outcome
Refresh Drive and verify the file is no longer visible. Inform teammates that the deletion is complete and share archiving options if applicable.
Tip: Keep a brief deletion log for future audits and compliance needs.
FAQ
What happens to a Google Sheet after you delete it from Drive?
Deleting a sheet moves it to Trash, where it can be restored until Trash is emptied. Permanent deletion erases the file from Trash and cannot be retrieved through standard recovery. If the file is shared or owned by someone else, permissions may affect the ability to permanently delete.
Deleting moves the sheet to Trash for potential recovery; permanent deletion erases it and may require owner or admin action for shared files.
Can I recover a sheet after permanently deleting it?
Permanent deletion makes recovery unlikely through normal means. If your organization has retention policies or backups, a Workspace admin might recover data under specific circumstances. Always confirm backup options before deleting.
Recovery after permanent deletion is not typical; check for admin backups if available.
Is permanently deleting the same as removing access for collaborators?
Permanent deletion removes the file entirely from Drive. Removing access stops others from viewing or editing, but the file may still exist in Trash until permanently deleted. For complete erasure, you must delete from Trash as well.
Deleting removes the file; removing access just blocks it, but deletion is needed for full erasure.
How do I delete multiple sheets at once permanently?
Select multiple files in Drive, move them to Trash, then empty Trash to permanently delete all selected items. Ensure each file is intended for deletion before you proceed.
You can delete several files together by sending them to Trash and emptying Trash.
What about data contained in a sheet that I still need later?
If data might be needed later, export a copy before deletion. Archiving preserves the data without keeping it active, reducing clutter while preserving access if required.
Export before deleting to keep a copy for future use.
Are there privacy concerns when deleting sheets with sensitive data?
Yes. Permanent deletion helps reduce exposure of sensitive content, but ensure backups comply with your privacy policies. Coordinate with admins for proper data-retention and deletion procedures.
Deleting sensitive data reduces exposure, but follow privacy policies and admin guidance.
Watch Video
The Essentials
- Verify ownership and exact location before deleting.
- Move to Trash first, then empty Trash to complete deletion.
- Always back up contents if archival value exists.
- Check for linked references and backups to avoid broken workflows.
- Document the deletion process for governance and audits.