How to Create a January 2026 Calendar in Google Sheets
Learn how to build a google sheets january 2026 calendar with dates, weekdays, and event notes. This How To Sheets guide covers layout, formulas, formatting, and sharing to create a reusable monthly calendar template.

You’ll build a January 2026 calendar in Google Sheets that automatically places dates by weekday, highlights weekends, and supports simple event notes. This quick answer previews layout, essential formulas, and formatting steps you’ll implement in the main article. Follow the steps to create a reusable template you can adapt for any month.
Why a google sheets january 2026 calendar matters
A google sheets january 2026 calendar is more than just a grid of dates—it’s a lightweight planning hub for students, professionals, and small business owners. When you embed dates, weekdays, and notes in a single sheet, you gain a reliable reference for deadlines, appointments, and team events. According to How To Sheets, building a calendar in Google Sheets is a practical, repeatable skill that you can reuse for any month or year. In this article, you’ll learn how to layout a clean calendar, choose a month-specific starting point, and structure data so you can add events with minimal friction. The result is a reusable template you can share with teammates or print for quick reference.
Core design principles for a calendar template
A reliable monthly calendar in google sheets january 2026 calendar should balance clarity with flexibility. Start with a simple grid: seven columns (Sun–Sat) and enough rows to cover the month’s weeks. Use a single row for day-of-week headers and a separate area for dates and events. Keep fonts legible, borders crisp, and colors accessible. The goal is to make the calendar easy to read at a glance, whether you’re planning a class schedule or project milestones. If you follow these design principles, you’ll minimize confusion and reduce the need for manual edits later. How To Sheets emphasizes keeping the month and year in a single, clearly visible header so you can swap to future months without renaming multiple cells.
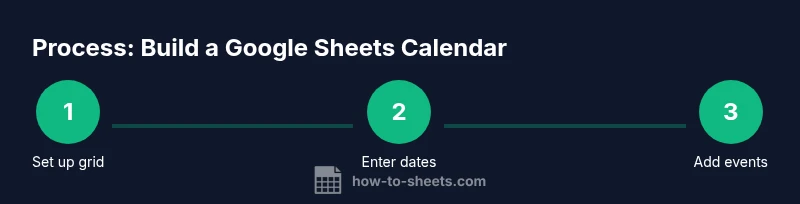
Step-by-step overview (high level)
This section outlines the practical steps you’ll execute in the dedicated STEP-BY-STEP block. You’ll create a new sheet, set up the header row with weekday names, craft a date-generation formula for January 2026, apply borders to form a calendar grid, add an events column, and enable simple formatting for readability. Each action in this overview is designed to be completed in under a minute, so you can iterate quickly and refine the layout as needed. The step-by-step approach keeps your calendar scalable across months and years.
Building the date grid with January 2026 in mind
To populate dates correctly, you’ll anchor your calendar to January 1, 2026, and fill across and down to cover all 31 days. Use a date formula to place the first day in the correct column, then propagate subsequent days with a simple addition. This approach ensures dates align with weekdays automatically, reducing manual repositioning. If you want a dynamic solution, you can replace the fixed year with a cell reference that you can edit to switch months quickly.
Formatting, borders, and readability
Formatting matters as much as the dates themselves. Apply borders to create a clean grid, center-align numbers, and use a consistent font size for all cells. Consider freezing the top row for headers and using conditional formatting to visually separate weekends. A light, neutral color palette and adequate contrast help you print or view on screens, especially for busy schedules. This is where accessibility best practices pay off.
Adding events, notes, and simple interactivity
A calendar becomes truly useful when you can attach events. Create an adjacent column or a separate sheet to record events by date. Link events back to the calendar using lookup formulas to keep everything synchronized. You can add data validation to categorize events (e.g., class, meeting, deadline) and keep notes within a reasonable length to preserve readability. When combined with conditional formatting, this becomes a practical planning tool.
Automating updates for future months
While this guide focuses on January 2026, the structure is easily generalized. Use named ranges for the month and year, then reference those in your date formulas to create calendars for February, March, or beyond. The approach scales well for students preparing term calendars and small businesses planning quarterly campaigns. Building a single, reusable template is the strategic move recommended by the How To Sheets team.
Printing, sharing, and maintenance tips
Decide whether you’ll print the calendar or keep it digital. For printing, set up print areas and adjust page layout to avoid cut-off dates. If you share the file with teammates, consider protecting cells that contain formulas to prevent accidental changes. Periodically review and update holidays, events, and reminders to keep the calendar accurate throughout the year. By maintaining a lightweight calendar, you’ll save time and stay organized. The How To Sheets team recommends keeping one canonical version for team-wide planning to minimize drift.
Authority and practical next steps
For hands-on guidance on practical Google Sheets calendar design, consult reputable sources and templates. The How To Sheets team emphasizes practical templates that save time and reduce manual data entry. Try starting with the January 2026 calendar you built and adapt it for other months, then export or publish as needed. By iterating on a single template, you can support diverse scheduling needs without rebuilding from scratch.
Tools & Materials
- Google account with access to Google Sheets(Needed to create, save, and share the calendar)
- Google Sheets-ready template or blank spreadsheet(Start from scratch or adapt an existing calendar)
- Internet-connected device (computer, tablet, or phone)(Access Sheets and collaborate)
- Optional: color palettes and fonts(For styling and readability)
- Print/export capability(PDF export or printer access)
Steps
Estimated time: 45-60 minutes
- 1
Create a new Google Sheets file and rename the first sheet to January 2026
Open Google Sheets, start a blank spreadsheet, and rename the first tab to January 2026. This establishes the dedicated workspace for your calendar and keeps related data together.
Tip: Use a consistent naming convention so you can clone this template for future months without confusion. - 2
Set up the weekday headers in a 7-column grid
In row 1, enter Sun, Mon, Tue, Wed, Thu, Fri, Sat to create the calendar’s seven-column layout. This header row anchors the dates below and provides immediate weekday context.
Tip: Copy the header row across with formatting to ensure alignment across all weeks. - 3
Enter a dynamic start reference for January 2026
In the first date cell, use a formula like =DATE(2026,1,1) to anchor the calendar to January 1, 2026. This ensures dates align with weekdays and can be updated for other months by changing only the year and month inputs.
Tip: Keep the year in a separate cell so you can swap months without editing multiple formulas. - 4
Fill the calendar dates across and down for all 31 days
Propagate dates by adding 1 day to the previous cell and wrap to the next row after Saturday. This creates a continuous date stream that fills the calendar grid accurately.
Tip: When copying dates, use an array formula or fill handle to speed up the process and avoid manual errors. - 5
Format the grid with borders and alignment
Apply borders to delineate cells, center dates, and keep font size uniform. Freezing the header row keeps context when scrolling, enhancing usability.
Tip: Use a light border style and a readable font size to improve print and screen readability. - 6
Highlight weekends with conditional formatting
Create a conditional formatting rule to color-code Saturdays and Sundays differently. Weekend highlighting helps with planning and reduces misinterpretations when scheduling tasks.
Tip: Test the rule across several weeks to confirm consistency and avoid accidental overrides. - 7
Add a simple events column or ledger
Add a separate column or a companion sheet to record events by date. Use VLOOKUP or XLOOKUP to bring event context into the calendar when needed.
Tip: Limit event notes to a practical length to maintain calendar clarity. - 8
Test, name, save, and share
Review the calendar for accuracy, give it a descriptive name, and share with teammates. Confirm that date alignment holds across devices and browsers.
Tip: Enable version history to track changes and revert if needed.
FAQ
How do I set up a 7-column calendar grid in Google Sheets?
Start with seven columns labeled Sun through Sat in the top row. Build your date grid directly under these headers and use a date-based formula to populate the days. This creates a clean, consistent calendar structure you can copy for other months.
Set up seven columns with Sun to Sat headers, then fill dates under them using a simple date formula.
Can I reuse the calendar template for other months?
Yes. Use a named month input and year cell to drive the date formulas. Duplicate the sheet and update only the month/year references to generate calendars for February, March, and beyond.
Absolutely—drive the calendar with month and year inputs, then duplicate for new months.
What formulas generate January 2026 dates?
A common approach is to anchor the first date with =DATE(2026,1,1) and then fill subsequent cells by adding 1 day. Use WEEKDAY to align days and adjust blocks for weeks.
Anchor with =DATE(2026,1,1) and fill days by adding 1; use WEEKDAY to align weeks.
How do I highlight weekends quickly?
Apply a conditional formatting rule that changes the background color for cells corresponding to Saturdays and Sundays. This is visually helpful for planning and avoids manual coloring.
Use conditional formatting to color weekends for quick visual cues.
Is it possible to print the calendar clearly?
Yes. Set a defined print area, adjust margins, and use fit-to-page settings if needed. Printing should preserve the grid and readability of dates and events.
You can print the calendar by setting a proper print area and margins.
Should I lock cells to prevent edits?
Lock formulas or critical cells to prevent accidental edits. You can protect ranges while keeping input cells editable for events.
Protect key cells to prevent accidental changes while allowing event edits.
Watch Video
The Essentials
- Plan monthly calendars with a reusable template.
- Link dates automatically to weekdays.
- Color-code events for quick scanning.
- Protect formulas to avoid accidental edits.
- Adapt the template for other months.