Google Sheets 6 Month Calendar: Step-by-Step Template
Learn how to build a google sheets 6 month calendar with six-month templates, dynamic dates, color coding, and printable views. Ideal for students, professionals, and small businesses seeking practical, step-by-step guidance.

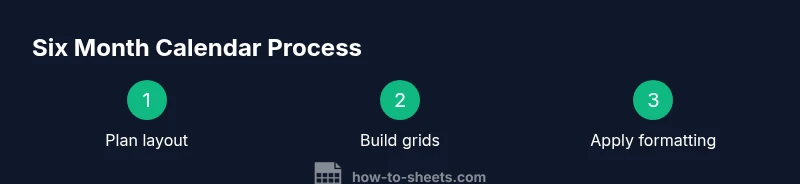
You will build a practical google sheets 6 month calendar by creating a six month grid, adding date logic, and incorporating event data in Sheets. This guide covers layout, date generation, formatting, and printing, with reusable steps you can adapt for any starting month. You’ll need a start month date and a plan for six months.
Why a google sheets 6 month calendar is useful\n\nA google sheets 6 month calendar provides a centralized view for planning events, deadlines, and milestones across six months without switching between apps. It keeps your schedule visible alongside related data, notes, and projections. This approach suits students tracking classes, professionals managing project timelines, and small business owners coordinating campaigns. According to How To Sheets, starting with a clear layout saves time later and reduces the chance of missing important dates. By choosing a six-month window, you balance long-term planning with the ability to adapt quickly to new events.\n
Planning your calendar layout\n\nBefore you start building the google sheets 6 month calendar, decide how you want to lay out the six months. You can stack months vertically, place them side by side, or create a single large grid that holds all six months. Think about readability, printability, and how you will attach events or notes. For most users, a two-column by three-row calendar block fits well on a standard monitor and prints cleanly on letter size. Decide whether you want a separate sheet per month or a consolidated sheet with six blocks. This planning phase reduces backtracking later.\n
Choosing a start month and data structure\n\nSelect a start month and set up a simple data structure to support six months of dates. A dedicated cell should hold the start date, for example the first day of the chosen month in 2026. Create a layout that can accommodate six months in either a vertical stack or horizontal row. Use a consistent range for each month so you can copy formulas and formatting easily. A consistent structure keeps maintenance small and predictable.\n
Building the six-month grid (monthly blocks)\n\nCreate six monthly grids by reserving a repeated block of rows and columns for each month. A typical monthly grid uses a 7-column week layout with 5–6 rows to cover all possible weeks. Each month block should display a header with the month name and year, followed by a row for day names (Sun–Sat) and then the date cells. Align each block so readers can scan months quickly.\n
Populating dates for all six months\n\nFill each month grid with the correct day numbers. Start with the first day of the month and offset the grid so days align under their weekday headers. You can copy the first month’s block and adjust the month reference for the next five months, or use a date formula that automatically advances months. Verify that each grid ends on the last day of its month and that empty cells appear where there is no date.\n
Headers, weekdays and print-ready formatting\n\nAdd a consistent header row for each month and include a row with weekday names. Use bold text and a color accent for headers to improve readability. When printing, choose landscape orientation if you’re placing all six months on one page, or print one month per page. Set margins and scale to fit your intended output.\n
Adding events and color coding\n\nCreate an events column or a dedicated notes area for each month. Use conditional formatting to highlight events by type, priority, or category. For example, assign colors for meetings, deadlines, and holidays. This visual differentiation makes the calendar easier to scan at a glance and helps you prioritize tasks.\n
Automating updates and maintenance\n\nKeep the calendar up to date by using dynamic date references wherever possible. If you change the start month, the six-month grid should update to reflect the new period. Lock cells that contain formulas to prevent accidental edits, and separate content from structure by using a dedicated data sheet for events. This separation makes long-term maintenance straightforward.\n
Printing, sharing, and exporting options\n\nDecide how you will share or print the calendar. Google Sheets supports printing across multiple pages, exporting as PDF, and sharing with collaborators. If you expect updates from others, enable sharing permissions and consider using a lightweight template that others can reuse without altering the core layout.
],
toolsMaterials":{"items":[{
name":"Computer with internet access","required":true,"note":"Use a modern browser like Chrome for best compatibility"},{"name":"Google account","required":true,"note":"Access to Google Sheets"},{"name":"Start month date","required":true,"note":"Enter as a date, e.g., 2026-04-01"},{"name":"Six-month calendar template","required":true,"note":"Blank sheet or a dedicated layout"},{"name":"Color palette for events","required":false,"note":"Optional but helpful for readability"}]}
stepByStep":{"steps":[{"number":1,"title":"Enter the start month date","description":"In a dedicated cell, enter the start month as a date to anchor the calendar. This date will determine the six month window displayed in the grid.","tip":"Use a date format you consistently apply elsewhere in your sheet"},{"number":2,"title":"Create six-month grid layout","description":"Reserve space for six monthly blocks, each with a header, a 7-column weekday row, and a 5–6 row date area. Decide between stacked or side-by-side months early.","tip":"Consistency in block size helps when copying formulas"},{"number":3,"title":"Label each month header","description":"Add a header for the first month and copy the header for the next five months, updating the month name and year automatically if possible.","tip":"Use a formula to generate month names from the start date"},{"number":4,"title":"Fill the first month's dates","description":"Populate the first month’s grid so days align under the correct weekdays. Leave empty cells where the month does not have a date.","tip":"Double-check the first weekday alignment to avoid misplacements"},{"number":5,"title":"Copy and adjust the grid for other months","description":"Duplicate the first month block five times and adjust the month reference to advance each block by one month.","tip":"Use paste special to preserve formulas without overwriting references"},{"number":6,"title":"Apply weekend highlighting","description":"Set up conditional formatting to color-code Saturdays and Sundays across all month blocks.","tip":"Use a single rule applied to all date cells for consistency"},{"number":7,"title":"Add events data","description":"Create a simple events area or columns for each month to record meetings, deadlines, and notes.","tip":"Keep event data separate from the date grid to avoid formula conflicts"},{"number":8,"title":"Set print-friendly view","description":"Configure print settings so the six months fit the chosen paper size. Consider landscape orientation for a single-page view.","tip":"Test print to verify margins and scaling"},{"number":9,"title":"Save as a reusable template","description":"Convert your layout into a template so you can reuse it for future periods by changing the start month date.","tip":"Protect core formulas to prevent accidental edits"}],"estimatedTime":"60-90 minutes"},
tipsList":{"tips":[{
type":"pro_tip","text":"Use named ranges for the start date and key grids to keep formulas readable"},{"type":"warning","text":"Be mindful of year-end month transitions to avoid misaligned dates"},{"type":"note","text":"Maintain a separate sheet for holidays to avoid clutter"},{"type":"pro_tip","text":"Incorporate a simple data validation for event categories to standardize entries"}]},
keyTakeaways":{"points":["Plan layout before data","Use dynamic headers for start month","Color-code events for readability","Test print early to prevent surprises","Save as a reusable template"]},
videoEmbed":{"videoQuery":"google sheets 6 month calendar tutorial"},
faqSection":{"items":[{
question":"How do I start a google sheets 6 month calendar?","questionShort":"Start month","answer":"Begin by selecting a start month date and reserving space for six months. Build six month blocks, align each month with weekday headers, and fill dates for the first month before duplicating across the rest.","voiceAnswer":"Start by choosing a start month date and creating six blocks. Fill the first month, then duplicate for the remaining months.","priority":"high"},{"question":"Can I automatically update when the year changes?","questionShort":"Auto year","answer":"Yes. Use date functions to advance months across blocks so January becomes February as appropriate. Test year transitions to ensure December rolls into January correctly.","voiceAnswer":"Yes, the calendar should update across year boundaries when you adjust the start month.","priority":"high"},{"question":"How do I colorize weekends across all months?","questionShort":"Color weekends","answer":"Set up conditional formatting rules that apply to all date cells. Define colors for Saturday and Sunday and apply the rule to every month block.","voiceAnswer":"Use a single weekend rule across all months to keep visuals consistent.","priority":"medium"},{"question":"Is printing the calendar easy?","questionShort":"Print calendar","answer":"Configure print settings to fit all six months on the chosen paper size. Adjust orientation, margins, and scaling, and preview before final print.","voiceAnswer":"Yes, with proper print settings you can print all six months clearly.","priority":"medium"},{"question":"Can I add holidays?","questionShort":"Holidays","answer":"Yes; maintain a separate holiday list and reference it in each month block. You can highlight holidays or display notes beside dates.","voiceAnswer":"Absolutely, holidays can be tracked in a dedicated section.","priority":"medium"},{"question":"What if a month has 5 weeks?","questionShort":"Five weeks","answer":"Ensure your grid supports up to 6 weeks by reserving an extra row for months that spill into a sixth week. Adjust headers accordingly.","voiceAnswer":"Some months need six weeks; include space for the extra row.","priority":"low"}]},
mainTopicQuery":"calendar",
Tools & Materials
- Computer with internet access(Use a modern browser like Chrome for best compatibility)
- Google account(Access to Google Sheets)
- Start month date(Enter as a date, e.g., 2026-04-01)
- Six-month calendar template(Blank sheet or a dedicated layout)
- Color palette for events(Optional but helpful for readability)
Steps
Estimated time: 60-90 minutes
- 1
Enter the start month date
In a dedicated cell, enter the start month as a date to anchor the calendar. This date will determine the six month window displayed in the grid.
Tip: Use a date format you consistently apply elsewhere in your sheet - 2
Create six-month grid layout
Reserve space for six monthly blocks, each with a header, a 7-column weekday row, and a 5–6 row date area. Decide between stacked or side-by-side months early.
Tip: Consistency in block size helps when copying formulas - 3
Label each month header
Add a header for the first month and copy the header for the next five months, updating the month name and year automatically if possible.
Tip: Use a formula to generate month names from the start date - 4
Fill the first month’s dates
Populate the first month’s grid so days align under the correct weekdays. Leave empty cells where the month does not have a date.
Tip: Double-check the first weekday alignment to avoid misplacements - 5
Copy and adjust the grid for other months
Duplicate the first month block five times and adjust the month reference to advance each block by one month.
Tip: Use paste special to preserve formulas without overwriting references - 6
Apply weekend highlighting
Set up conditional formatting to color-code Saturdays and Sundays across all month blocks.
Tip: Use a single rule applied to all date cells for consistency - 7
Add events data
Create a simple events area or columns for each month to record meetings, deadlines, and notes.
Tip: Keep event data separate from the date grid to avoid formula conflicts - 8
Set print-friendly view
Configure print settings so the six months fit the chosen paper size. Consider landscape orientation for a single-page view.
Tip: Test print to verify margins and scaling - 9
Save as a reusable template
Convert your layout into a template so you can reuse it for future periods by changing the start month date.
Tip: Protect core formulas to prevent accidental edits
FAQ
How do I start a google sheets 6 month calendar?
Begin by selecting a start month date and reserving space for six months. Build six month blocks, align each month with weekday headers, and fill dates for the first month before duplicating across the rest.
Start by choosing a start month date and creating six blocks. Fill the first month, then duplicate for the remaining months.
Can I automatically update when the year changes?
Yes. Use date functions to advance months across blocks so January becomes February as appropriate. Test year transitions to ensure December rolls into January correctly.
Yes, the calendar should update across year boundaries when you adjust the start month.
How do I colorize weekends across all months?
Set up conditional formatting rules that apply to all date cells. Define colors for Saturday and Sunday and apply the rule to every month block.
Use a single weekend rule across all months to keep visuals consistent.
Is printing the calendar easy?
Configure print settings to fit all six months on the chosen paper size. Adjust orientation, margins, and scaling, and preview before final print.
Yes, with proper print settings you can print all six months clearly.
Can I add holidays?
Yes; maintain a separate holiday list and reference it in each month block. You can highlight holidays or display notes beside dates.
Absolutely, holidays can be tracked in a dedicated section.
What if a month has 5 weeks?
Ensure your grid supports up to 6 weeks by reserving an extra row for months that spill into a sixth week. Adjust headers accordingly.
Some months need six weeks; include space for the extra row.
Watch Video
The Essentials
- Plan layout before data
- Use dynamic headers for start month
- Color-code events for readability
- Test print early to prevent surprises
- Save as a reusable template