How to Check When a Google Sheet Was Last Updated in 2026
Discover practical steps to determine when a Google Sheet was last updated using revision history, timestamps, and Apps Script. Includes templates and troubleshooting for students, professionals, and small teams.

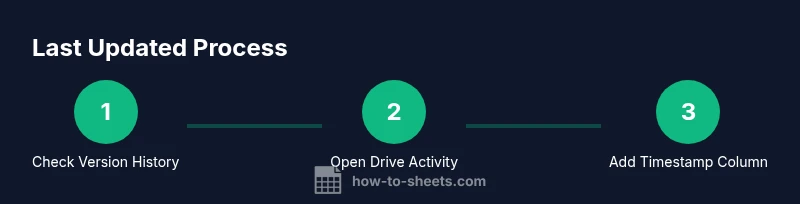
By design, Google Sheets records the last update time through revision history and activity logs. To verify, open File > Version history > See version history, then select a recent version to view its timestamp. You can also enable a timestamp column or run a small Apps Script to log edits. This quick guide walks you through reliable approaches.
What 'last updated' means in Google Sheets
In Google Sheets, there isn't a single, universal timestamp that marks the last moment every change occurred across the entire workbook. Instead, Sheets tracks changes at the version level and attaches timestamps to saved versions. For many workflows, this means you must combine multiple signals to determine when data last changed. According to How To Sheets, revision history is the most reliable starting point for most teams, especially when working with shared documents. In practice, you can inspect the most recent versions, see who edited them, and read the recorded times. If you want ongoing, real-time awareness, you’ll need a lightweight logging approach that records edits as they happen. The rest of the article outlines practical methods, from simple checks in the UI to automated logs created with Apps Script. The goal is to give you a clear, repeatable process you can apply to any sheet you own or co-manage.
Method A: Check Version History in Google Sheets
The version history panel in Google Sheets is your first stop when you want to know when a sheet was last touched. Access it via File > Version history > See version history. The panel lists saved versions with timestamps and author information. You can click any version to compare it with the current state and observe what changed. This method does not require any scripts or setup, making it ideal for one-off checks or quick audits. If you’re collaborating, tell teammates to read timestamps to understand the sequence of edits. Remember that older versions may be collapsed or pruned in very large sheets, so this approach works best for ongoing documents with frequent saves.
Method B: Inspect Drive Activity for Timestamps
Google Drive tracks activity such as edits, shares, and restorations. In the Google Drive web interface, you can open the file and view the activity pane to see a rough timeline of interactions, including when changes occurred. This method provides context beyond a single sheet version and can help you trace edits that came from different collaborators or connected apps. Note that Drive activity can be limited by permissions, retention settings, and the type of account (personal vs. business). Use it as a supplementary signal alongside Sheets’ own version history.
Method C: Create a Timestamp Column (manual) and logging
For continuous, sheet-wide visibility, add a dedicated Last Updated column in your data range. This approach gives you a per-row or per-record signal about when the row last changed. Start by inserting a new column named Last Updated, then decide how you populate it: a simple manual entry, a formula that triggers on changes in a row, or a script that writes NOW() when edits occur. This method creates a straightforward, auditable log and can be shared with other users without requiring special permissions. It’s especially useful for dashboards and data-tracking sheets where readers expect a visible indicator of freshness.
Method D: Automate Logging with Google Apps Script
If you want automatic, real-time logging, Apps Script is your friend. Write an onEdit(e) trigger that checks which cell changed, then writes a timestamp into your Last Updated column for the affected row. You can customize to log only specific columns, exclude header rows, or include user email for accountability. Deploy it as a bound script in the sheet or as a standalone script if you manage multiple sheets. This method is robust but requires basic scripting knowledge and careful testing to avoid performance issues.
Method E: Using Formulas to Indicate Recency
Formulas can help surface recency signals without scripts, though they won’t capture every edit if you rely on manual updates. For example, you can couple a static timestamp with an array formula that spills values across a range. Use an IF condition to show a date when a key column is non-empty, or combine TODAY() with a check to reflect changes to your data. While not a complete audit trail, these helpers make it easier for readers to gauge freshness at a glance.
Practical templates: ready-to-use options
To save time, you can clone or adapt ready-to-use templates that implement last-updated tracking. A simple template adds a Last Updated column and a basic onEdit script; a more robust approach includes per-row timestamps and a small dashboard showing the most recently updated rows. Consider a test sheet with a few sample rows to validate your setup before rolling it out to active workbooks. If you share the template, include clear instructions about who can edit the log and how updates are recorded. The result is a repeatable workflow that reduces ambiguity during collaboration.
Troubleshooting and limitations
Not every method is perfect in every context. Revision history may not capture long-running edits in very large files, and Drive activity depends on account permissions. If your timestamps disappear after a sheet is copied, ensure your script references the correct sheet name or range. Based on How To Sheets analysis, a timestamp column provides the most reliable signal across shared sheets, but you should couple it with version history for verification. Always test changes in a copy of the workbook to avoid disrupting live data.
Security, privacy, and sharing implications
Tracking updates can reveal who changed what and when, which has privacy and security implications in shared workspaces. Limit access to the logging column or Apps Script project, and consider using protected ranges to prevent accidental edits to the log. When deploying automated logging in a team environment, document the logging rules and obtain consent from collaborators if required by policy. The goal is transparency without creating unintended exposure of sensitive data in your logs.
Quick-start checklist and recommended workflow
- Decide which tracking method best fits your sheet (revision history, timestamp column, or Apps Script).
- Add a Last Updated column and enable an onEdit-based log if you choose automation.
- Test edits from multiple users to confirm timestamps update correctly.
- Review version history to validate that your logs reflect real edits.
- Establish a recurring audit for critical sheets so updates are consistently visible.
The How To Sheets team recommends starting with revision history for a quick audit and progressively adding an automated log for ongoing accuracy. This blended approach gives you immediate visibility and a robust, auditable trail for future reference.
Tools & Materials
- Computer or device with internet access(Any modern browser (Chrome, Edge) works)
- Google account with sheet access(Must have view or edit rights to the target sheet)
- Target Google Sheet(Preferably a test sheet for experiments before production use)
- Timestamp column template(Optional; used if you plan to log updates per row)
- Apps Script editor(Needed for automated logging via onEdit triggers)
Steps
Estimated time: 30-60 minutes
- 1
Plan your tracking method
Decide whether you’ll rely on revision history, a dedicated timestamp column, Apps Script automation, or a combination. Consider your team size, the sheet’s purpose, and how often you expect edits to happen.
Tip: Start with revision history for quick validation before building automation. - 2
Add a Last Updated timestamp column
Insert a new column labeled Last Updated. Decide the update trigger: manual entry, a formula, or an automated script.
Tip: Place the timestamp far enough from data to avoid accidental edits. - 3
Implement an onEdit trigger (Apps Script)
Open Extensions > Apps Script and write a simple onEdit(e) function that writes NOW() to the Last Updated column when edits occur in target rows.
Tip: Test on a copy of the sheet to prevent disruption to live data. - 4
Test edits from multiple users
Have collaborators make edits from different accounts or devices and verify timestamps update as expected across all affected rows.
Tip: Check edge cases like edits in header rows or across multiple columns. - 5
Review and adjust the setup
Compare logs with version history. Refine which columns trigger logging and whether to log user identity for accountability.
Tip: Document the rules so new collaborators understand how updates are tracked.
FAQ
Where can I find the last updated time in Google Sheets?
Open File > Version history > See version history to view timestamps for saved versions. This shows who edited and when changes occurred.
Open Version history from the File menu to see when edits happened and who made them.
Can revision history show exact timestamps for every edit?
Yes, version history provides timestamps for saved versions, which reflect when changes were captured. For ongoing edits, use additional logging methods.
Yes, you can see timestamps for saved versions in version history.
Is there a way to auto-log updates without manual entry?
Yes. Use Apps Script with an onEdit trigger to write timestamps automatically, or set up a per-row timestamp log.
You can auto-log with Apps Script using onEdit triggers.
Will editing a cell in one sheet affect timestamps in all sheets?
If you implement a single, sheet-wide log, every edit in that sheet updates the log. For multiple sheets, use per-sheet logging or a centralized log sheet.
It depends on how you set up the logging; you may scope it to each sheet or to a central log.
What are the limitations of using revision history?
Revision history can be limited by the age of the file and the number of versions kept. It’s great for quick audits but may miss long-running edits in very large sheets.
Revision history has age and version limits, so it’s not a perfect long-term log.
Can timestamps be updated by formulas only?
Formulas can surface recency but do not reliably log edits. To capture edits, you need triggers or manual updates.
Formulas alone won’t reliably log edits; you need scripts or manual updates.
Watch Video
The Essentials
- Plan your tracking method before implementation
- A dedicated timestamp column provides strong visibility
- Apps Script enables automated, real-time logging
- Revision history is useful for quick audits
- Test thoroughly and document your workflow