Repair Order Template for Google Sheets: A Practical Guide
Learn to build a repair order template in Google Sheets that captures client details, job scope, parts, labor, and status with formulas for streamlined work orders.

By the end, you will create a repair order template in Google Sheets that captures client details, job scope, parts, labor, and status. You’ll learn a reusable structure, essential formulas, and practical customization for different repair scenarios. This template helps standardize invoicing, tracking, and reporting, making your service workflow more efficient.
Why this template matters for repair businesses
In a repair operation, consistent data capture and clear job tracking reduce miscommunication and billing delays. A repair order template in Google Sheets provides a central place to collect client details, vehicle or device information, job scope, required parts, labor estimates, and status. With a shared template, technicians, front-desk staff, and managers stay aligned, whether you work with a single client or scale to dozens of orders per week. This approach supports faster invoicing, better cash flow, and improved customer satisfaction. The flexibility of Sheets allows you to add custom fields for diagnostics, warranty notes, and follow-up tasks without purchasing specialized software. Throughout this guide, you’ll learn how to design a robust, scalable template that grows with your business, while keeping data consistent across records.
Core components of a repair order template
A solid repair order template includes several essential sections:
- Client and contact information: name, phone, email, and address.
- Job details: job ID, date received, due date, priority, and a concise description.
- Equipment or asset: serial numbers, model, or asset tag.
- Parts and labor: itemized line items with quantities, unit prices, and line totals.
- Status and routing: current status (e.g., received, in progress, completed) and responsible technician.
- Invoicing and payment: subtotal, taxes, discounts, total, and payment status.
- Notes and attachments: warranty notes, photos, or repair instructions.
Design the template to automatically compute totals, flag overdue items, and prevent accidental edits in critical fields. A well-structured layout makes it easier to train new staff and maintain consistency across orders.
Designing in Google Sheets: layout and data structure
Start with a clean, tabbed layout: one sheet for the master order log, another for invoices, and an optional dashboard. Use a consistent header row with clearly named columns. Use data validation to standardize fields (status, priority, payment status). Implement a unique job ID scheme to avoid duplicates. For performance, keep formulas simple and avoid volatile functions on the main log. Use named ranges to simplify formulas and improve readability. Consider choosing a color-coding strategy to distinguish statuses at a glance. Finally, set up a print-friendly version to share hard copies with customers when needed.
Step-by-step design blueprint
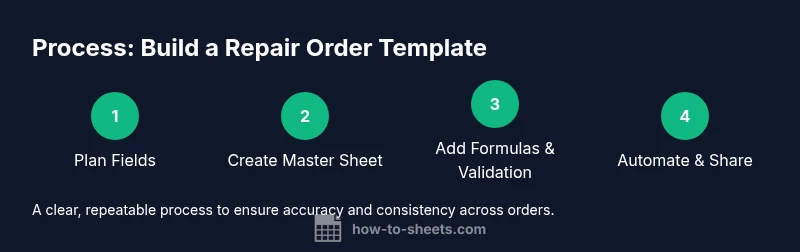
- Plan the fields you need: core data plus optional extras.
- Create the master sheet with a header row and row-based data entries.
- Add data validation for statuses and payment states.
- Build formulas for totals and overdue indicators.
- Set up a separate invoice sheet that pulls data from the master sheet.
- Protect critical cells to avoid accidental edits.
- Test with sample jobs and adjust as needed.
Formulas and data validation you should use
Key formulas to adopt include SUM for totals, IF and IFS for status flags, and LOOKUP functions (VLOOKUP or INDEX/MATCH) to fetch client or asset data. Use SUMIF/SUMIFS to accumulate totals by job type, and conditional formatting to highlight overdue or high-priority orders. Data validation dropdowns ensure consistent status options (e.g., received, in progress, completed) and prevent typos. Named ranges help keep formulas readable as your sheet grows.
Automating status, invoices, and reporting
Google Sheets offers built-in features that automate routine tasks. Use conditional formatting to highlight overdue items, filter views to segment active vs completed jobs, and create a simple invoice sheet that auto-fills from the master log. Macros can record a sequence of actions (e.g., generate an invoice, export to PDF, and save to Drive) to speed up repeated workflows. For reporting, build a basic dashboard with charts showing open vs closed jobs, revenue by month, and parts usage trends.
Template customization for different repair scenarios
Every business handles repairs differently. Your template should support variants such as warranty work, paid service, and bulk job orders. Consider adding optional sections for diagnostics notes, warranty codes, or supplier part numbers. You can also set up per-client rate cards and alternative tax rules if you operate across regions. Keep the core fields consistent while modularly adding or hiding sections based on job type.
Collaboration and security considerations
Because customer data is sensitive, set proper sharing permissions and protect critical cells. Use a dedicated Google Drive folder with restricted access and enable version history to track changes. Encourage team members to use the same templates and naming conventions to preserve consistency. Regularly review access lists and rotate permissions when staff changes occur.
Real-world example: a completed template walkthrough
Imagine a repair shop handling smartphone screens. The master log captures client name, contact details, device model, and job description. Each line item lists a screen replacement and a battery, with quantities and prices. The status column tracks stages from received to completed. After work is finished, the invoice sheet auto-populates subtotals and taxes, and a final PDF invoice is generated for the customer. This workflow reduces data-entry duplication and helps the team stay on top of deadlines.
Tools & Materials
- Laptop or desktop computer with internet(Needed to access Google Sheets and follow the guide.)
- Google account with Google Sheets access(Essential for creating and saving templates in the cloud.)
- Test data set (client names, jobs, parts)(Useful for validating formulas and data validation.)
- Printer or PDF export option(Optional for printing or sending invoices to customers.)
- Notes and reference documents(Keep a copy of any business policies or tax notes handy.)
Steps
Estimated time: 60-90 minutes
- 1
Plan essential fields
Outline client data, job details, assets, parts, labor, status, and invoicing fields. Decide which fields are mandatory and which can be optional for different job types.
Tip: Create a draft list on paper first to avoid missing critical fields. - 2
Create master sheet with headers
Set up a clean header row and define a data range for the job entries. Use descriptive column names and consistent data types.
Tip: Use freeze panes so headers stay visible during data entry. - 3
Add data validation
Create dropdowns for status (e.g., received, in progress, completed) and payment status. This reduces errors and improves reporting.
Tip: Link validation lists to named ranges for easier maintenance. - 4
Incorporate core formulas
Add totals with SUM, calculate line totals, and implement IF/IFS for status warnings. Use VLOOKUP or INDEX/MATCH to pull client or asset data when needed.
Tip: Keep formulas modular and document them with comments. - 5
Create a separate invoice sheet
Design an invoice view that pulls from the master sheet and formats for printing or emailing. Include tax, discounts, and total due.
Tip: Test invoice generation with sample jobs to confirm accuracy. - 6
Protect and share
Protect critical cells and ranges, and set appropriate sharing permissions. Train staff on how to use the template consistently.
Tip: Use protected ranges to prevent accidental edits to formulas. - 7
Test and iterate
Run through end-to-end scenarios, adjust fields, and refine workflows. Solicit feedback from teammates to improve usability.
Tip: Keep a changelog for template updates.
FAQ
What is a repair order template in Google Sheets?
A repair order template is a prebuilt sheet structure that standardizes job details, parts, labor, pricing, and status for service work. It helps you collect consistent data and generate invoices.
A repair order template is a ready-made sheet for standardizing service records.
Can I reuse the template for multiple clients?
Yes. Create separate sheets or sections within the template for each client or use a master template with per-job rows. Use filters to view a single client's jobs.
Yes, you can reuse it for many clients.
Which formulas are essential for totals and status tracking?
Use SUM for totals, VLOOKUP or XLOOKUP to pull client data, and IF/IFS to track status. Data validation ensures correct status options.
Essential formulas include SUM, VLOOKUP or XLOOKUP, and IF for status.
How should I protect sensitive customer data in Sheets?
Limit access, lock sensitive cells, enable protected ranges, and use shared drives with restricted permissions. Regularly audit access.
Protect customer data by restricting access and locking sensitive fields.
Is there a recommended workflow after completing a repair order?
Convert the summary into an invoice, update the order status, archive completed jobs, and generate reports for management. Automations can streamline this.
After completion, issue an invoice and archive the job.
Watch Video
The Essentials
- Plan core fields before building the template
- Use data validation to maintain consistency
- Keep formulas simple and well-documented
- Protect critical cells to prevent errors
- Test with real-world scenarios and iterate