How to Protect a Google Sheet from Editing: A Step-by-Step Guide
Learn how to protect a Google Sheet from editing with protected ranges, sheet protection, and restricted sharing. This guide covers best practices, real-world scenarios, and a clear step-by-step process to secure your data while maintaining collaboration.

You can protect a Google Sheet from editing by using protected ranges, sheet protection, and restricted sharing. Start by adjusting sharing settings to Viewers or Commenters, then use Data → Protected sheets and ranges to lock cells or tabs. Layer protections for granular control and auditing.
Why protecting a Google Sheet from editing matters
In any context where data accuracy matters—class projects, client budgets, or project trackers—protecting a Google Sheet from editing helps prevent accidental or intentional changes that could derail decisions. This guide answers how to protect a google sheet from editing by outlining practical strategies that balance collaboration with control. By implementing layered protections, you can keep sensitive formulas, critical data, and finalized sections intact while still allowing teammates to contribute where appropriate. The goal is to minimize risk without creating bottlenecks or resentment among collaborators. How you protect depends on the sheet’s audience, data sensitivity, and whether you expect external sharing; the approach below covers common patterns used by students, professionals, and small business teams.
Core protections: protected ranges vs. sheet protection
Google Sheets offers two primary lines of defense: protected ranges and protected sheets. Protected ranges lock down specific cells or ranges (for example, a column of formulas or a budget totals row), while protected sheets restrict editing on an entire tab. Proper use means you can lock critical areas (like formulas or sensitive data) while leaving input zones open to authorized users. When setting protected ranges, you can specify who may edit them, or require approver access even for editors. Sheet protection, on the other hand, applies to a whole tab and is useful for preserving the structure of a dashboard or master sheet. Combining both methods provides fine-grained control and reduces the chance of accidental edits.
Sharing settings and visibility: the first line of defense
Before you lock anything down, consider who truly needs editing rights. Use the Share settings to grant specific people Editor access only when necessary, and set general access to Viewer or Commenter for others. Avoid leaving the link open to “Anyone with the link” with editing privileges. For teams, consider creating a restricted group for editors and a separate group for viewers. This separation minimizes risk while maintaining smooth collaboration. Remember, visibility often drives responsibility; clear ownership of sections helps prevent confusion and accidental edits.
Practical scenario: protecting a budget tracker
Suppose you have a monthly budget workbook with dedicated input cells for the team and fixed formulas in the totals row. You can protect the totals row and any formulas with a protected range, then protect the Budget sheet to shield layout and summary sections. Provide edit access only to the person responsible for budgeting, and keep the rest as Viewers or Commenters. If a new collaborator needs temporary editing rights, grant access temporarily and revoke it when the task is complete. This approach keeps the workbook dynamic while safeguarding critical calculations.
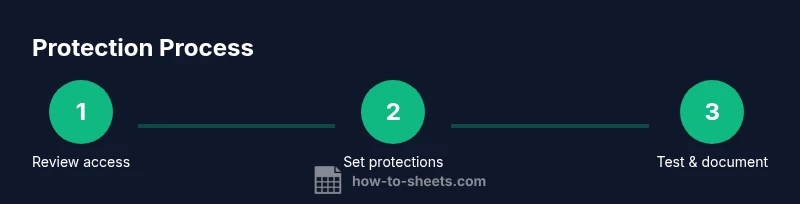
Step-by-step practical examples: applying protections in a real sheet
- Open the Google Sheet and review current sharing permissions. Identify which users should edit and which should only view. 2. Go to Share and adjust access: set most collaborators to Viewer or Commenter; reserve Editor access for trusted team members. 3. Select the range of cells you want to protect (e.g., formulas or sensitive data) and choose Data → Protected sheets and ranges. 4. Create or edit a protected range, specify the allowed editors, and save. 5. If you need to lock an entire tab, choose Protect sheet and set editing permissions for the tab. 6. Test the protections by signing in as a different user or using an incognito window to ensure restrictions are enforced. 7. Maintain a short changelog or version history so you can track who made edits and when. 8. Periodically review protections as project roles change or new data is added, updating ranges and permissions as needed.
Common pitfalls and how to avoid them
- Relying solely on sharing settings: Even with restricted sharing, protected ranges are essential for granular control.
- Forgetting to review permissions after role changes: Revisit access when a team member changes roles or leaves.
- Assuming protections hide data: Protected ranges prevent edits but do not hide formulas or values from users with access.
- Not testing protections: Always verify that the protections work from a viewer perspective before going live.
- Over-securing: Excessive restrictions can impede collaboration; aim for a practical balance between protection and workflow.
Advanced techniques for teams and organizations
For larger teams or sensitive data, layer protections across multiple sheets, assign backup editors for emergency recovery, and enable version history with descriptive naming. Consider using named protected ranges for consistency across different sheets; this makes it easier to apply the same protections when you duplicate a sheet. In enterprise contexts, leverage Google Workspace Admin settings for domain-wide protections and implement audit logging to track access changes over time. Regular training and clear policies help ensure everyone understands how and when protections apply, reducing accidental breaches.
Conclusion and maintenance tips
Protection is not a set-and-forget feature. It requires ongoing governance: periodically audit who has edit access, refresh protected ranges as data structure changes, and communicate changes to the team. A well-protected Google Sheet supports both accountability and efficiency by preventing disruptive edits while preserving collaborative work.
Tools & Materials
- Google account with access to the target sheet(You must be the owner or have sufficient privileges to set protections.)
- URL or name of the Google Sheet to protect(Keep a backup copy before making major protection changes.)
- Browser with Google Sheets access(Recommended to use a modern browser for best UI support.)
- Backup/export of the sheet (optional but recommended)(Export as Excel/CSV or create a copy for safe restoration.)
- A collaborator list for permissions (names or emails)(Used to grant specific editing access when needed.)
Steps
Estimated time: 20-30 minutes
- 1
Review current sharing and ownership
Open the sheet’s Share settings and list current editors. Confirm who truly needs edit rights and who can be restricted to view/comment. This step prevents accidental granting of broad access later.
Tip: Document ownership before changing permissions to avoid confusion. - 2
Set broad sharing permissions
In Share settings, set general access to 'Viewer' or 'Commenter' for most people, and restrict editing to a specific list of trusted users. Avoid 'Anyone with the link' editing except in very controlled scenarios.
Tip: Use the 'Add people' field to grant precise access without exposing the sheet publicly. - 3
Protect essential cells or ranges
Select the critical range (e.g., formulas, totals) and choose Data → Protected ranges. Define who can edit the range or restrict to only you. Save changes.
Tip: Name protected ranges clearly (e.g., 'Formulas-Totals-2026'). - 4
Protect entire sheets as needed
Right-click the sheet tab you want to shield and select Protect sheet. Configure edit permissions so only authorized users can modify the tab.
Tip: Use this for dashboards or master sheets that must remain structurally intact. - 5
Test protections with a test account
Log in as a different user or use an incognito window to verify that the protections prevent edits where expected. Adjust as needed based on results.
Tip: Testing helps catch oversights before going live. - 6
Document changes and monitor versions
Enable and review version history, adding notes about why protections were changed. Regularly review who has access and update protections for new data.
Tip: Version history is a safety net for rollbacks.
FAQ
What is a protected range in Google Sheets?
A protected range locks specific cells from editing by most collaborators. You can designate who may edit those cells, while allowing others to view or comment. This is essential for preserving formulas and critical data.
Protected ranges lock specific cells so only authorized people can edit them, keeping important parts safe while others can still view or comment.
Can I restrict editing without sharing the sheet?
Yes. By adjusting share settings to Viewer or Commenter and using protected ranges, you limit who can make changes while still allowing collaboration in non-locked areas.
You can restrict editing by setting viewing permissions and protecting only the necessary parts of the sheet.
Do protections hide formulas or data from viewers?
Protections do not hide formulas or data from viewers who have access. They only prevent edits. To hide content, you’d need different approaches like hiding columns or sheets with restricted sharing.
Protections prevent edits but don’t hide content from viewers who have access.
How do I test protections effectively?
Use a test account or an incognito session to check that protected ranges and sheets behave as intended. Look for unrestricted edits in protected areas and ensure restricted sections stay locked.
Test protections by trying to edit from a non-owner account to confirm restrictions work.
What’s the best practice for teams using Google Sheets regularly?
Create a governance plan: define roles, apply layered protections, document changes, and review permissions quarterly. This keeps collaboration healthy while safeguarding critical data.
Set clear rules, then routinely review who can edit what to maintain data integrity.
Watch Video
The Essentials
- Protect critical data with both ranges and sheet protections
- Grant access by role, not by convenience
- Test protections with test accounts to verify behavior
- Regularly audit permissions and update protections