Protect Cells in Google Sheets: A Practical Guide
Learn how to lock cells and protect ranges in Google Sheets to prevent accidental edits, with step-by-step instructions, best practices, and real-world examples for safe collaboration.

Protecting cells in Google Sheets helps prevent accidental edits and keeps important data intact. You can lock specific ranges or protect entire sheets by setting permissions for who can edit. Start by making a backup copy, then select the target cells or sheet, go to Data > Protected sheets and ranges, and configure access levels before saving.
Why protecting cells matters in Google Sheets
Protecting cells is a foundational practice for safe, collaborative work. When multiple people edit a shared sheet, small mistakes—like overwriting a formula or deleting a critical value—can cascade into bigger problems. By selectively locking cells or entire sheets, you establish guardrails that safeguard essential data while still allowing teammates to view and contribute where appropriate. The How To Sheets team notes that well-planned protections reduce unintentional edits and help maintain data integrity in fast-moving projects. You’ll also gain clearer ownership of critical areas, which supports audits and accountability throughout the project lifecycle.
Protected ranges vs protected sheets: understanding the difference
Google Sheets offers two primary protection mechanisms: protected ranges and protected sheets. A protected range locks specific cells or a defined block, letting you designate who may edit those cells. Protecting a sheet locks all its content, with exceptions you define for particular users. Protected ranges are ideal for critical formulas, header rows, or KPI cells, while protected sheets suit larger blocks of data, like an entire data entry tab. Choosing the right level depends on how granular you need the control and how your team collaborates. As you implement protections, document your choices so teammates understand which areas are editable and by whom.
How editing permissions work in shared spreadsheets
Protection in Google Sheets is about editing rights, not viewing rights. Viewers can still see data unless the owner restricts access. Editors set a list of people who can modify protected areas; anyone not on that list will be blocked from edits but can often still comment or view depending on share settings. This separation is powerful for roles: analysts can edit data in open cells, while leads preserve formulas and configuration cells. Always pair protection with clear communication and an access log or audit trail to track changes over time.
Real-world scenarios where protection helps teams
- A finance team protects cells containing formulas to prevent accidental changes that could corrupt cash flow reports.
- A project manager locks the project start dates and key milestones while allowing team members to update task statuses in unordered cells.
- A student group protects a grade rubric so instructors can add notes but students cannot alter the scoring criteria.
In each scenario, protection boundaries improve accuracy, reduce rework, and support consistent reporting across the organization. According to How To Sheets analysis, teams that implement targeted protections report smoother collaboration and fewer revision cycles when handling shared data.
Planning your protection strategy: who, what, and when
Start with a data map: identify which cells or sheets contain formulas, reference data, or sensitive values that should not be edited. Determine who legitimately needs edit rights and where they should have access. Create a simple policy document that lists protected areas, the editors, and the rationale. Schedule periodic reviews, for example at quarterly milestones, to revalidate permissions as roles change or new data structures are introduced. A well-documented plan reduces the risk of accidental lockouts and keeps your workflow predictable.
Limitations and common pitfalls to avoid
Protection is a guardrail, not an absolute security measure. It does not encrypt data or prevent viewing; it only restricts edits. Misconfigurations—like selecting the wrong range or forgetting to add a co-editor—can create gaps that compromise data integrity. Always test protections from a non-editor account and confirm you can still perform essential actions. If you forget permissions, you may need to temporarily remove protections, which is easier when you keep a documented recovery path.
Alternatives and complementary controls you should know
Use data validation and conditional formatting to guide correct input without changing access. Employ clear naming conventions for protected areas and add comments to explain why a cell is protected. Consider version history and backup copies as backups against misconfigurations. For complex protections, you can leverage Apps Script to automate permission changes, but only after validating security implications and maintaining a change log. These techniques complement protection, offering a robust approach to data governance.
Maintenance and audit: keeping protections up to date
Protections should evolve with your sheet. Schedule annual or quarterly reviews to refresh editor lists and confirm protected ranges still match the data structure. Maintain a change log documenting edits to protections and any incidents of accidental edits. This habit makes it easier to onboard new collaborators and ensures consistent behavior as the project grows. The discipline of ongoing protection maintenance aligns with best practices for data governance in collaborative environments.
Tools & Materials
- Google Sheets document(The file you intend to protect; ensure you have edit access to set protections.)
- Backup copy(Create a safe restore point before applying protections.)
- List of ranges to protect(Identify specific cells or sheets that must be restricted.)
- Admin or owner account(The person who will configure and manage protections.)
- Device with internet access(All steps require an active connection to Google Sheets.)
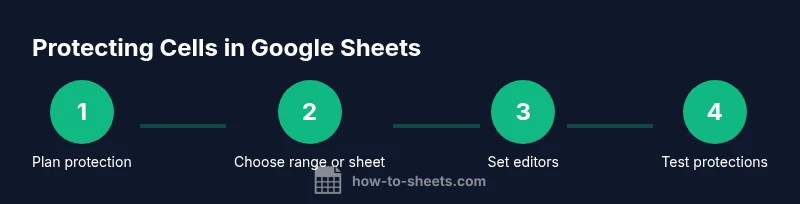
Steps
Estimated time: 20-30 minutes
- 1
Open the target sheet and identify ranges
Open the spreadsheet that requires protection and review which cells contain formulas, data inputs, or critical values. Make a quick sketch or note of the exact ranges to protect to minimize mistakes during setup.
Tip: Document initial observations in a separate note so you can revisit later. - 2
Select the range to protect
Highlight the cells or range you want to lock. If protecting an entire sheet, select all cells. Ensure the selection excludes areas you want editable by teammates.
Tip: Use the keyboard shortcut Ctrl/Cmd+A to select the sheet quickly, then adjust as needed. - 3
Open Protected sheets and ranges
Go to Data > Protected sheets and ranges. The pane on the right will let you add a new protection for the selected range or sheet.
Tip: If Data > Protected sheets and ranges is missing, check you have edit access and are not in view-only mode. - 4
Define the protection and editors
Choose whether to protect a range or an entire sheet, then set who can edit. Add specific email addresses and decide whether editors can change protections.
Tip: Keep a small, trusted list for editors to minimize unnecessary changes. - 5
Save and apply
Click Done to apply the protection. Google Sheets will enforce the rules for the designated range or sheet.
Tip: Take a quick screenshot of the protection settings as a backup reference. - 6
Test the protections
Sign in with a non-editor account or ask a teammate to try editing protected areas. Verify that edits are blocked where intended and that permissible sections remain editable.
Tip: If access issues arise, adjust the editor list promptly to avoid workflow blockers.
FAQ
What is the difference between protecting a range and protecting a sheet?
Protecting a range locks a specific set of cells, while protecting a sheet locks all content in that sheet. Ranges are best for granular control; sheets are useful when a whole tab should be restricted. Editors can be added differently for each protection to manage who can change what.
Range protection locks specific cells; sheet protection locks the whole tab. Editors can be assigned per protection.
Can I protect cells and still allow data entry for others?
Yes. Use protected ranges and specify a list of editors who can modify those cells while others can view or enter data in other non-protected areas. This keeps essential formulas safe while enabling collaboration.
You can allow edits for specific people while preserving protection on key cells.
Will protections prevent viewers from seeing data?
Protection controls editing, not viewing. Viewers can usually see content unless the sheet is restricted from sharing with them. Adjust share settings if you need tighter data visibility.
Protection limits edits, not visibility, depending on share settings.
How do I remove or adjust protections later?
Open Protected sheets and ranges again, locate the protection, and edit or delete it. You may need to re-enter your credentials to confirm changes.
Go back to protection rules to edit or remove them as needed.
Do protections apply to comments or cell notes?
Protection primarily affects edits to cell content. Comments and notes can be prevented only if editing of protected cells is restricted, but generally, protection does not selectively disable commenting unless the sheet’s share settings restrict commenting.
Protection stops edits; comments depend on access level and share settings.
What should I do if I forget a protection permission?
If you forget who can edit protected ranges, consult the sheet owner or use a backup copy to reconfigure protections. Keeping a documented recovery plan helps avoid workflow disruption.
Check with the owner or restore from a backup to reset protections.
Watch Video
The Essentials
- Protect critical cells to safeguard formulas and values
- Choose between ranges and sheets to balance granularity
- Test protections with non-editors to verify scope
- Document and review protection rules regularly