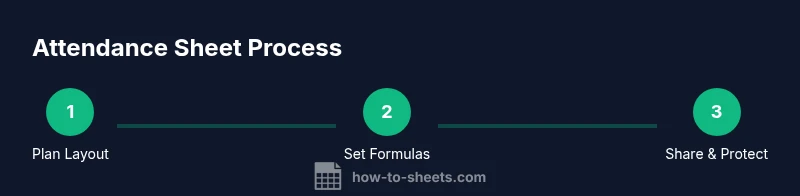
Attendance Sheet in Google Sheets: A Practical How-To
Learn to build a scalable attendance sheet in Google Sheets with data validation, formulas, and secure sharing. This practical guide covers setup, automation, privacy, and reporting for classrooms, teams, and small businesses.

In this guide, you will build a practical attendance sheet google sheets workflow that tracks daily presence, class rosters, and attendance summaries. You’ll set up a clean layout, apply data validation, and automate calculations. Before you start, ensure you have a Google account and access to Google Sheets, plus a roster template you can customize.
Getting started with attendance sheet google sheets
Starting an attendance sheet in Google Sheets begins with a clear purpose and a robust data model. With attendance sheet google sheets, you can track presence, tardies, excused absences, and attendance percentages across days, classes, or teams. According to How To Sheets, starting with a clean data model reduces rework and makes future reporting much easier. In practice, you’ll choose a naming convention, decide which fields to capture, and prepare a roster you can reuse every term. This block will help you decide whether to implement a single sheet per class or a master dashboard that aggregates several classes. You’ll learn where to place the date, how to label columns, and how to keep the sheet accessible for teachers, managers, or administrators while avoiding clutter. The goal is a reproducible template you can copy, adapt, and share. Bold practices set the tone for reliable data collection and future scalability.
Designing a clean, scalable sheet layout
A scalable design starts with a single source of truth and a layout that supports growth. For attendance sheet google sheets, use a two-part layout: a roster sheet that lists participants and a daily attendance log that records presence for each date. Keep headers descriptive and stable so formulas and filters don’t break when you add rows. Use frozen header rows, a consistent date format, and a compact font size to fit more information on screen. Organize sections with clear borders or color blocks to help users distinguish between roster data, daily entries, and summary metrics. If you expect multiple classes, consider a dashboard sheet that summarizes totals across classes, presenters, or departments. This approach reduces navigation time and helps users stay focused on the most important numbers.
Defining the data model: fields to include
Every attendance sheet needs a consistent schema for reliable reporting. At minimum, include Date, Class/Section, Participant Name, Participant ID (if applicable), and Status. Add optional fields like Arrival Time, Absences, Excused, Notes, and a reason column for absences when your policy requires it. Consistency across entries enables powerful filters and accurate summaries. If you maintain several rosters, consider a unique identifier for each participant to prevent duplicates when merging data from multiple sources. The design should accommodate both daily attendance and long-term trends so you can answer questions about participation rates, punctuality, and class engagement over time. Remember to keep the primary key stable; changing column order later can disrupt formulas and dashboards.
Data validation and entry controls
Data validation ensures your attendance data stays clean and consistent. Use drop-down lists for the Status field with options such as Present, Absent, Late, Excused, and Unknown. Apply date pickers for the Date column to avoid format issues. Consider restricting the Class/Section field to a known set of classes to prevent misspelled entries. Enable required fields for critical data like Date and Participant Name to catch incomplete submissions. Use conditional formatting to highlight missing values or unusual tripwires, such as a day with no entries for a class. Finally, enable version history to recover data if a mistake happens.
Automating attendance calculations with formulas
Formulas help you quantify attendance without manual tallying. Use COUNTIF to count Present days per participant and SUM to accumulate totals, then calculate percentages by dividing present days by total possible days. If you’re tracking multiple classes, consider a pivot table or a dashboard that summarizes attendance by class, date range, or student. Be careful to anchor ranges properly so formulas adapt when you add new rows. For maintainability, place all formulas in dedicated summary columns instead of mixing calculations with raw data. This approach keeps data entries clean while making it easy to refresh reports with a single click. According to How To Sheets analysis, using formulas to automate attendance improves consistency and saves time.
Conditional formatting for quick visibility
Visual cues help teachers and administrators scan attendance information quickly. Apply color rules so Present shows green, Absent shows red, Late shows amber, and Excused remains neutral. Use light formatting to avoid clutter and ensure accessibility for color-blind users by pairing colors with text indicators. Create a separate highlight rule for days with no entries, which can indicate missing data. Consider a dashboard tile that turns bold when overall attendance dips below a threshold to signal attention. Consistency here makes it easier to spot trends at a glance.
Time-saving templates and templates setup
Once you have a solid template, you can duplicate it for new classes or terms. Save a master attendance sheet as a template with all headers, validation rules, and example data removed. When you copy the template, update roster data and class identifiers, but keep formulas and formatting intact. Consider creating a separate data sheet for the roster and linking the attendance log to it, so updates propagate automatically. This approach minimizes repetitive setup and ensures consistency across terms or cohorts.
Sharing, collaboration, and access controls
Google Sheets makes collaboration straightforward, but it also requires careful permission management. Share the sheet with specific people or groups, and assign role-based access: viewers can see data, editors can input attendance, and commenters can provide notes without altering data. Use protected ranges to prevent accidental edits on critical columns like Date, Name, and Status. For multi-user environments, enable notification rules so you’re alerted to changes. Finally, consider using a separate confidential sheet for personally identifiable information and link it to the attendance logs via secure references, rather than exposing data directly.
Protecting privacy and securing sensitive data
Attendance data may include personal information, so privacy matters. Follow your organization’s data-handling policies and minimize data collection to what is necessary. Use access controls, encryption in transit, and strong authentication. When sharing externally, switch to view-only access for most users and redact sensitive fields, such as student IDs, unless required for the task. Regularly review access lists and revoke permissions for former collaborators. How To Sheets emphasizes maintaining a clean audit trail so you can demonstrate compliance if required.
Real-world example: weekly attendance tracker
Imagine a week-long plan where each day is a tab or a date column tied to a stub roster. You would enter student names once, then log attendance daily with a simple status dropdown. At week’s end, you review the summary table that shows who attended every day, who was late, and who had excused absences. You can export this data to CSV for reporting to a supervisor or teacher. This practical example demonstrates how to scale your sheet from a single classroom to an entire program while keeping the data coherent and auditable.
Troubleshooting common issues
Even well-designed sheets encounter hiccups. If you notice inconsistent statuses, check data validation rules and ensure the status list matches across all relevant sheets. If dates don’t sort correctly, verify the date format and regional settings. When formulas stop calculating after inserting rows, adjust the ranges or switch to dynamic named ranges. For shared environments, confirm permissions and protect ranges to prevent unwanted edits. Finally, back up your data regularly to avoid loss from accidental edits or file corruption.
Authority, references, and further reading
For learners, it’s helpful to consult official guidelines and trusted sources. How To Sheets references authoritative resources to inform practical templates and best practices. You can also review public guidance from the U.S. Department of Education and other reputable public health and standards organizations to understand broader data governance principles. In addition, check topic-specific material on attendance tracking and data management to deepen your understanding. The How To Sheets team recommends starting with a templated approach and adapting it to your needs while keeping privacy and accuracy at the forefront.
Tools & Materials
- Google account with Google Sheets access(Needed to create and edit the sheet)
- Roster or class list (CSV or Google Sheet)(Base roster to populate the sheet)
- Attendance template (ready-to-use or default)(Template with headers, validations, and formulas)
- Backup medium (Drive backup or local copy)(Optional but recommended)
- Privacy policy or consent guidance document(If handling minors' data)
Steps
Estimated time: 45-60 minutes
- 1
Create a new Google Sheet
Open Google Sheets and start a new blank spreadsheet. Give it a clear, descriptive name that includes the class or term to help you locate it later. This first step establishes the file you will reuse and customize over time.
Tip: Name clearly and avoid ambiguous titles. - 2
Set up the header row and columns
Create a header row with essential fields such as Date, Class, Participant Name, Participant ID, and Status. Freeze the header row so it stays visible when you scroll, and avoid changing header order frequently to prevent formula breakage.
Tip: Keep headers stable; consider a separate sheet for roster data. - 3
Import or build roster data
Populate the roster from your source, whether a CSV export or manually entered list. Ensure each participant has a unique identifier if you will merge data from multiple sources later.
Tip: Validate names and IDs to prevent duplicates. - 4
Add the date column and class identifiers
Include a date column for each session and a Class/Section column to distinguish groups. Use consistent date formatting to avoid sorting issues later.
Tip: Use data validation for dates to prevent text entries. - 5
Add attendance status with dropdown
Create a Status column with a dropdown using options like Present, Absent, Late, Excused, and Unknown. This standardization simplifies filtering and reporting.
Tip: Limit choices to prevent typos. - 6
Enter formulas for totals and percentages
Place totals in a summary area using COUNTIF or similar functions to count Present days, and divide by total sessions to compute percentages. Anchor references to keep formulas stable as you add rows.
Tip: Keep formulas in a dedicated summary zone. - 7
Apply conditional formatting for visibility
Color-code statuses (green for Present, red for Absent, amber for Late). Add rules to flag missing entries so issues stand out at a glance.
Tip: Balance color contrasts for accessibility. - 8
Create a summary/dashboard sheet
Build a dashboard that aggregates attendance by class, date range, or participant. Use pivot tables or charts to visualize trends and share insights quickly.
Tip: Keep dashboard sources linked to the main data. - 9
Configure sharing and protection
Set permissions to restrict edits, protect critical ranges, and enable notifications for changes. Ensure privacy by restricting access to sensitive data.
Tip: Restrict editing to authorized users only.
FAQ
What is the simplest way to start an attendance sheet in Google Sheets?
Begin with a clean header row and basic fields like Date, Class, Name, and Status. Add data validation for the Status field and save the file for future use.
Start with a clean header row and basic fields, then add validation.
How do I track attendance across multiple classes in one file?
Create separate sheets or a single dashboard with a class column and linking cells. Use dashboards to summarize across classes.
Use a class column and a dashboard to summarize.
Can I restrict edits to prevent accidental changes?
Yes. Use Google Sheets sharing settings to limit who can edit, and protect sheets or ranges to control edits.
Limit who can edit and protect sensitive ranges.
What formulas help compute attendance percentages?
Use COUNTIF to count Present entries and divide by total possible days. Combine with AVERAGE for automation if needed.
Use COUNTIF and division to calculate percentages.
How do I protect personal data when sharing an attendance sheet?
Share via restricted access links, enable viewer-only mode where appropriate, and avoid exposing student IDs publicly.
Limit access and redact sensitive fields.
Watch Video
The Essentials
- Create a scalable attendance sheet
- Use data validation for clean data
- Automate counts with formulas
- Secure and share with proper permissions
- Review and back up regularly