Google Sheets Beginning of Month: Step-by-Step Guide
Learn how to establish a reliable month-start workflow in Google Sheets using date formulas and Apps Script to automate data initialization, budgeting, and monthly reporting.

You will set up a month-start framework in Google Sheets to automatically initialize or reset data at the beginning of each month, using date formulas and a simple Apps Script. This supports budgeting, task tracking, and reporting. Key steps include defining the month start, creating reusable templates, and automating the rollover for consistency for teams.
What the Beginning of Month Means in Sheets
For many students, professionals, and small business owners, the start of a new month is a natural point to reset or initialize data in Google Sheets. This isn’t about a single date stamp; it’s about building a repeatable workflow that creates a clean slate for the current month while preserving a run history of previous months. A reliable month-start framework helps with budgeting accuracy, task planning, and monthly reporting. The foundation is a defined anchor date (the first day of the month) and a small set of formulas that automatically generate the rest of the month’s data. According to How To Sheets, establishing a consistent month-start workflow in Google Sheets reduces manual data entry and errors and makes month-end close smoother for teams.
Key ideas to carry forward:
- Define a single month-start anchor date that all formulas reference.
- Build a date series that automatically fills the days of the month.
- Use that anchor to drive templates, budgets, and task lists.
- Consider an automated rollover for common sheets to minimize repetitive work.
Essential date functions for month-start logic
Google Sheets provides a small set of date functions that shine when you need a reliable month start: TODAY(), DATE(), YEAR(), MONTH(), DAY(), and EOMONTH(). The combination of these functions makes it easy to compute the first day of the current month, the last day, and all days in between. A typical anchor is the first day of the current month: =DATE(YEAR(TODAY()), MONTH(TODAY()), 1). You can also calculate the last day with =EOMONTH(TODAY(),0). A helpful approach is to store the anchor in a dedicated cell (e.g., A1) and reference it throughout your sheet (A1 = DATE(YEAR(TODAY()), MONTH(TODAY()), 1)).
Common patterns include:
- First day of the month: =DATE(YEAR(TODAY()), MONTH(TODAY()), 1)
- Last day of the month: =EOMONTH(TODAY(), 0)
- First day of next month: =EOMONTH(TODAY(), 0) + 1
- Building a date series: start in A2 with the first day and fill down with A3 = IF(A2 < EOMONTH($A$1,0), A2+1, "")
Designing a month-start template in Sheets
A robust month-start template in Sheets uses a fixed anchor and a dynamic date series to drive multiple data sections (budgets, tasks, inventory, etc.). Here’s a practical layout:
- A1: Month anchor (first day of current month) with the formula =DATE(YEAR(TODAY()), MONTH(TODAY()), 1).
- A2:A is the date column. A2 copies the anchor, and A3 uses a formula to extend the dates through the month: =IF(A2 < EOMONTH($A$1,0), A2+1, "").
- B column onward store related data (budget amounts, task statuses, inventory levels).
- Use named ranges to reference the month start and end dates in formulas elsewhere.
- Create a light validation rule to prevent overwriting the anchor cell and to preserve data integrity.
Templates like this enable you to quickly copy the same structure to a new month and still retain historical data for analysis. How To Sheets’ analysis shows that consistent month-start templates improve onboarding speed for new teammates and reduce setup time for recurring reports.
Automating month rollover with Apps Script
Apps Script adds power beyond formulas by performing calendar-aware rollovers, resets, or archiving between months. A typical script detects when the date hits the first of the month and then performs a controlled rollover:
- Copy important month-end values to a dedicated archive area
- Clear or reset counters (e.g., hours tracked, expenses, or task counts) while preserving the template
- Create a fresh month sheet or reset ranges within the same sheet
- Optional: create a log entry noting the rollover timestamp for auditing
A simple approach is to create a container-bound script that runs on a time-driven trigger or a manual trigger. Start by reading the anchor date in A1, calculating the start of the current month, and applying changes to the target ranges. You can expand the script to handle multiple sheets for a multi-workbook setup.
Use cases: budgeting, tasks, inventory
A month-start workflow supports a wide range of use cases:
- Budgeting: Start each month with zeroed expense counters while preserving prior months for trend analysis. Use the anchor date to slice data by month and feed it to charts and dashboards.
- Task tracking: Create a monthly task list with due dates anchored to the first of the month. You can auto-populate a calendar-like view and then filter by status as you progress.
- Inventory and sales: Reset stock levels or sales targets each month, while archiving previous month activity for performance review.
- Reporting: Build month-over-month dashboards that automatically pull the current month’s data via named ranges and dynamic date filters.
Real-world benefit: teams that implement month-start templates report faster month-end closes and fewer late data corrections because the data structure is consistent and predictable.
Structuring a month-start workflow in a multi-sheet workbook
In larger workbooks, separate sheets for inputs, calculations, and dashboards keep the month-start logic clean and auditable. A typical structure:
- Input sheet: where you rotate in raw data (expenses, hours, tasks).
- Calculation sheet: all the formulas that derive totals, averages, and month filters.
- Dashboard sheet: live charts and KPIs that aggregate the current month’s data.
- Archive sheet: a quick dump of the prior month’s totals for reference and auditing.
Tips for multi-sheet workbooks:
- Use consistent named ranges for monthStart and monthEnd.
- Reference the anchor in formulas across sheets to keep everything in sync.
- Protect critical cells (like the month anchor) to prevent accidental edits.
This modular approach makes it easier to hand the workbook to new users and to extend the setup to additional months or different teams without rewriting core logic. How To Sheets emphasizes modular design to improve maintainability and ease of onboarding.
Common mistakes and how to avoid them
Common pitfalls include: forgetting to update the month anchor when testing with a different month, overwriting the anchor with data, and not handling February’s varying length. Avoid these by:
- Keeping the anchor in a locked cell and referencing it with absolute references.
- Testing with a synthetic data month (e.g., setting TODAY() to a known date via a test sheet) before deploying.
- Using EOMONTH to determine the last day of the month rather than hard-coding month lengths.
- Documenting the workflow in a dedicated sheet so new collaborators understand the logic quickly.
By treating the month-start setup as a small, auditable pipeline rather than a single formula, you reduce errors and improve resilience when data is imported or edited by multiple people. The long-term payoff is a predictable, auditable month-end close.
Testing and validating month-start automation
Testing a month-start workflow should be a staged process. Start by validating the anchor date formula (A1) and confirm the date series in A2:A extends to the last day of the month. Then verify downstream calculations (budgets, tasks, inventory) reference the correct date range via named ranges. Run a mock rollover using Apps Script and inspect the Archive and Dashboard sheets.
Create a small test suite: check that the first day of the next month is calculated correctly, confirm that all daily rows render as expected for a 30- or 31-day month, and ensure no data loss occurs when the script runs. Sleep on the test results and perform a second round after a few days of simulated activity. This measured approach catches edge cases like leap years or unusual month lengths before production use.
Quick-start template plan
If you’re starting now, use this pragmatic plan to get up and running quickly:
- Step 1: Create a dedicated Month anchor cell with =DATE(YEAR(TODAY()), MONTH(TODAY()), 1).
- Step 2: Build a date series in column A using =IF(A2 < EOMONTH($A$1,0), A2+1, ""). Fill down for 1-2 rows beyond the current month to visualize the pipeline.
- Step 3: Add data columns for budgets, tasks, or inventory that will be populated by month.
- Step 4: Create a simple Apps Script to archive the previous month and reset counters; add a time-driven trigger that runs on the 1st day of each month.
- Step 5: Set up a dashboard to visualize this month’s totals and status; ensure charts reference named ranges tied to the current month’s date anchor.
- Step 6: Test end-to-end with a demo month, verify results, and document the process for future users.
With this plan, you’ll have a repeatable, auditable month-start workflow that scales as your needs grow. How To Sheets’ team recommends starting with a minimal template and gradually adding automation as you confirm the basics work reliably.
Tools & Materials
- Google account with Sheets access(Needed to access Google Sheets and Apps Script editor)
- Sample spreadsheet or template(Create or duplicate a template for the month-start workflow)
- Apps Script editor access(Open from Extensions > Apps Script to implement a rollover script)
- Time zone awareness resources(Ensure the spreadsheet and script run in the correct time zone)
Steps
Estimated time: 60-90 minutes
- 1
Define the month start anchor
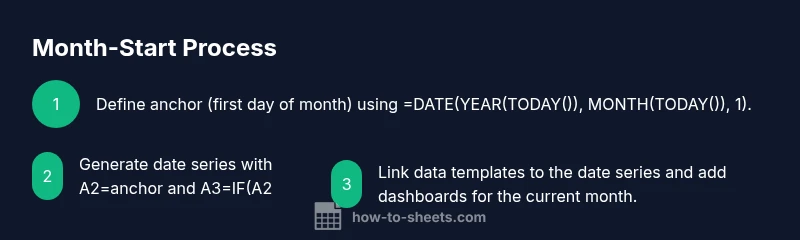
Create a dedicated cell (e.g., A1) that computes the first day of the current month using =DATE(YEAR(TODAY()), MONTH(TODAY()), 1). This anchor will drive all downstream month logic.
Tip: Lock the anchor cell with protection to prevent accidental edits. - 2
Populate the month’s date column
In A2, reference the anchor; in A3, use =IF(A2 < EOMONTH($A$1,0), A2+1, ""). Fill down to cover the entire month. This creates a date series that adapts to February and leap years automatically.
Tip: Use conditional formatting to highlight weekends or holidays. - 3
Link data templates to the date series
Create columns B, C, D for budgets, tasks, or inventory and tie them to the date series with simple SUMIFS or VLOOKUP references using the month range (A1 to last day).
Tip: Keep formulas consistent across months by using named ranges for monthStart and monthEnd. - 4
Create a month-start data template
Build a template layout with headers for key metrics and dashboards. Use data validation and conditional formatting to keep data entry clean as you roll into a new month.
Tip: Maintain a separate sheet for templates to avoid overwriting the active month. - 5
Add an Apps Script to automate rollover
Open Extensions > Apps Script and write a function to archive the previous month’s data and reset counters at month start. This reduces manual steps and minimizes errors.
Tip: Start with a small, safe script that only archives and resets a couple of key ranges. - 6
Set up a time-driven trigger
In Apps Script, create a trigger to run the rollover function on the 1st day of every month. This ensures the workflow runs automatically with minimal oversight.
Tip: Test the trigger in a staging sheet before enabling it in production.
FAQ
How do I calculate the first day of the current month in Google Sheets?
Use the anchor formula =DATE(YEAR(TODAY()), MONTH(TODAY()), 1) and reference it in other calculations. This keeps all month-start logic consistent.
Use the formula =DATE(YEAR(TODAY()), MONTH(TODAY()), 1) to get the first day, and reference it elsewhere in your sheet.
Can I automatically fill the days of the month without manual input?
Yes. Create a date series starting with the first day and use =IF(A2 < EOMONTH($A$1,0), A2+1, "") to extend through the month.
Yes. Start with the first date, then fill down using a simple IF formula to reach the month’s end.
Is Apps Script necessary for month rollover, or can I do everything with formulas?
Apps Script is optional but helpful for automating rollover tasks. Pure formulas can handle month-start data generation, but scripts make resets and archiving repeatable with a single click or schedule.
Scripts aren’t required, but they make automation reliable and hands-free.
What about time zones when scheduling month-start tasks?
Set the spreadsheet time zone in File > Settings and align Apps Script time zone accordingly to avoid off-by-one issues at month boundaries.
Set the time zone in Settings to keep things consistent across tools.
How should I test the month-start workflow before going live?
Test with a known month (e.g., temporarily adjust TODAY() via a test sheet or use a separate staging sheet) to verify date generation, data linking, and the rollover script works as expected.
Test with a mock month to ensure dates and rollovers behave correctly.
What if February has fewer or more days than expected?
Rely on EOMONTH to determine the last day of the month so your date series stops precisely at month end, even in leap years.
Rely on EOMONTH to handle February correctly.
Watch Video
The Essentials
- Define a single month anchor date.
- Generate a dynamic date series for the month.
- Link templates to the date series for consistency.
- Automate rollover with Apps Script for reliability.