Lock Cells from Editing in Google Sheets: A Practical Guide
Learn how to lock cells from editing in Google Sheets using Protect range and Protect sheet. Step-by-step instructions, tips, and best practices for preserving data integrity in shared spreadsheets.

You can lock cells from editing in Google Sheets by protecting the range or the entire sheet, then specifying who can edit. Start by selecting the cells you want locked, choose Protect range (or Protect sheet), set edit permissions, and share the sheet with view-only access for others. This keeps critical data safe while allowing collaboration where appropriate.
What locking cells accomplishes in Google Sheets
Locking cells in Google Sheets serves as a data governance tool. It prevents accidental or unauthorized changes to critical values, formulas, and references while still allowing teammates to collaborate on other parts of the same spreadsheet. When you lock cells, you create a protective layer that requires specific people to override the restriction. This is especially useful in shared budgets, project trackers, class rosters, and inventory lists where a single wrong edit can cascade into errors. By design, Google Sheets supports both range-level protection and full-sheet protection, enabling fine-grained control over who can modify which parts of a document. The practical effect is precision: teammates keep editing where it’s safe, while sensitive cells remain stable until an authorized reviewer or editor approves changes.
To maximize effectiveness, pair locking with clear ownership, naming conventions, and a documented change log. When everyone understands which cells are protected and why, the chance of accidental edits drops dramatically.
In this guide, you’ll learn how to implement cell protection correctly, differentiate between protecting a range and protecting an entire sheet, and apply best practices that balance collaboration with data integrity.
Tools & Materials
- Computer or device with internet access(Any modern browser; Google account needed to access Sheets.)
- Google Sheets document(Shared or private sheet where protection will be applied.)
- Account with editing permissions(Owner or existing editor can configure protections.)
- A clear naming scheme for protected ranges(Optional but helps future audits.)
Steps
Estimated time: 15-25 minutes
- 1
Open the Google Sheet and select the target cells
Navigate to the sheet and click-and-d drag to highlight the exact cells you want to lock. You can lock a single cell, a continuous range, or multiple non-adjacent ranges by holding Ctrl/Cmd while selecting. The goal is to define the precise area that needs protection.
Tip: Use Ctrl/Cmd to select non-contiguous ranges in one go to avoid repeating steps. - 2
Open the Protect range tool
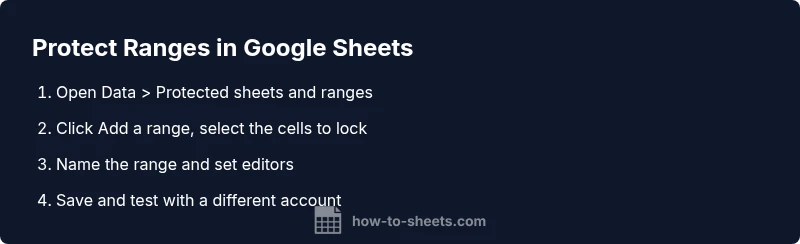
Right-click the highlighted area and choose “ Protect range ” from the context menu, or go to Data > Protected sheets and ranges. A sidebar will appear where you configure the protection settings.
Tip: If you don’t see Protect range, make sure you have editing rights and the sheet isn’t already protected. - 3
Define the protection for the range
In the sidebar, give the range a descriptive name (e.g., “Q1 Budget Locked Cells”) and confirm the range. This step binds the specific cells to a protection rule rather than a vague blanket lock.
Tip: A clear name helps teammates understand why the cells are protected. - 4
Set who can edit the protected range
Under “Except editors,” add individuals or Google Groups who should be allowed to modify the protected cells. You can also choose to allow only the owner to edit, or leave it as “Only you.”
Tip: Be conservative with exceptions; too many editors can defeat the protection. - 5
Finish and apply the protection
Click “Done” to apply the protection. Recheck the protected cells by attempting to edit from a different account or ask a collaborator to test editing permissions.
Tip: If you lock yourself out, you can remove protection by returning to the Protect range panel. - 6
Optional: protect the entire sheet
If your goal is broad control, use the Protect sheets and ranges option to apply protection to the entire sheet with selective editing permissions for certain ranges or users.
Tip: Sheet-level protection is more restrictive; this may impact workflows that require frequent edits.
FAQ
What is the difference between locking a range and protecting an entire sheet?
Protecting a range locks only the selected cells, while protecting the entire sheet restricts edits across all cells unless you specify exceptions. Range protection is more flexible for mixed datasets, whereas sheet protection provides a stronger guardrail when the whole document should be restricted.
Protecting a range locks specific cells; protecting the sheet locks everything except the allowed editors.
Can I still edit protected cells if I am the owner?
Owners and users listed as editors can still modify protected cells. If you remove an editor, those cells will be locked for that user as well. Always verify who has edit access after changes.
Editors you’ve granted can still edit protected cells; remove someone only if you’re sure they shouldn’t edit.
Will protecting cells notify other collaborators when changes occur?
Protecting cells does not automatically send notifications. Changes are governed by permissions; collaborators will know they can’t edit protected areas and can request access or edits from the allowed editors.
No automatic alerts; users just see that certain cells are protected.
How do I unlock a protected range later?
Open the Protect range panel again, select the protected range, and click Delete or change editors. You may be prompted to re-authenticate.
Return to protection settings, remove the range, then save.
Is there a way to lock cells while leaving formulas intact?
Yes. Protect the cells that contain values or inputs, keeping formula cells unlocked if you want them to auto-calc. This prevents accidental changes to inputs while preserving formulas.
Protect inputs, not formulas, to keep calculations intact.
How does protection interact with offline mode?
Protection works when online; in offline mode edits may not be blocked until re-sync. When you reconnect, protected cells remain locked as configured.
In offline mode, you might edit until you reconnect; protections apply once online again.
Watch Video
The Essentials
- Protect specific cells to prevent accidental edits
- Use explicit permission—limit who can edit protected ranges
- Test protections from other accounts to verify effectiveness
- Prefer range-level protection over full-sheet protection when possible