Mastering the Google Sheets Printable View
Master the google sheets printable view to produce clean, print-ready spreadsheets. Learn print ranges, layout, scaling, headers, and exporting to PDF for sharing with colleagues and instructors.

Printing in Google Sheets is straightforward once you set the print range, choose the right layout, and enable repeating header rows. This quick answer summarizes the essential steps so you can print single pages or multi-page workbooks accurately and consistently, with clear guidance you can repeat for future sheets. These steps focus on reliability for students, professionals, and small business owners alike.
What is the google sheets printable view and why it matters
In the world of school projects, professional reports, and client-ready budgets, the google sheets printable view is the print-ready rendering of your data. It determines what appears on paper or in a PDF, how wide columns are, where page breaks occur, and how headers repeat across pages. Proper use of the printable view saves time, reduces wasted paper, and helps you present information clearly. When you optimize this view, you ensure that headers stay visible, data remains aligned, and color choices translate well to black-and-white prints. As you get comfortable with these settings, you’ll notice a smoother workflow for recurring print tasks and less last-minute chaos before submission or delivery.
Preparing your spreadsheet for printing
Before printing, clean up your sheet to avoid stray data and misaligned content. Start by removing unnecessary columns and hidden rows, then adjust column widths to fit on a page without crowding. Freeze the first row if it contains headers so it remains visible across pages. Consider coloring with print-friendly tones and avoiding very light shades that disappear when printed. Use borders sparingly to separate sections, and ensure totals or summaries are placed where they won’t break awkwardly across pages. If your sheet contains multiple data blocks, you may want to print them separately to keep the output readable and organized.
Setting print areas and layout options
In Google Sheets, you control what prints by using the print dialog. Press File > Print or Ctrl/Cmd+P to open the print sidebar. Decide between printing the Current sheet, the Entire workbook, or a Selected range. The layout options let you choose Portrait or Landscape orientation, set margins (Normal, Narrow, or Custom), and decide whether to print gridlines or notes. The ability to print a specific range is especially helpful for worksheets with non-contiguous data. Always preview the result in the sidebar before exporting to PDF or sending to a printer.
Scaling, orientation, and margins for clean prints
Scaling is a powerful tool when contents are wider than a page. Use Fit to width or Fit to page to ensure all columns fit neatly on one or a few pages. Orientation matters: wide tables usually print better in Landscape, while tall lists fit better in Portrait. Margins influence readability; if you find data jammed at the edge, switch to Narrow margins and recheck the print preview. In many cases, a mid-level scale (e.g., 90–100%) keeps fonts legible while reducing page count. Be mindful that aggressive scaling can compress data and reduce clarity.
Headers, footers, and repeating rows
Headers and footers can carry document information like titles or page numbers. In the print settings, toggle Headers & footers and decide what to include. Repeating header rows on every printed page helps keep context intact for long prints and multi-page reports—select the top row (or frozen rows) as the repeat source. If you have a grand total or footnotes, place them on a page that won’t be split awkwardly across pages. These tweaks preserve readability and professionalism in the final output.
Advanced tips: printing from multiple sheets and PDFs
When your workbook contains several sheets, you can print them individually or export a combined PDF. For multi-sheet outputs, consider printing each sheet separately with consistent layout settings, then combine PDFs in your preferred tool. If you anticipate sharing the file electronically, exporting to PDF preserves formatting more reliably than sending a raw Sheets file. For color documents, remember that some printers or PDFs may render colors differently; adjust contrast or grayscale as needed to maintain legibility.
Common pitfalls and how to fix them
Printing surprises often come from overlooked settings. If text is cut off on the right, switch to a wider page or reduce font size slightly. If gridlines disappear in the print, enable Gridlines in the print dialog. If header rows stop appearing after the first page, recheck the repeating header range and ensure it matches your selection. Always run a quick test print on a single page to verify margins, alignment, and readability before committing to a full print or PDF export.
Tools & Materials
- Computer or mobile device with internet access(Google Sheets ready; ensure you can access the target file)
- Printer or PDF printer(For hard copies or digital exports)
- Google account access to Sheets(Needed to open and print the file)
- A4 or Letter paper(Optional if printing on paper)
- Pen or highlighter(Helpful for marking sections during prep)
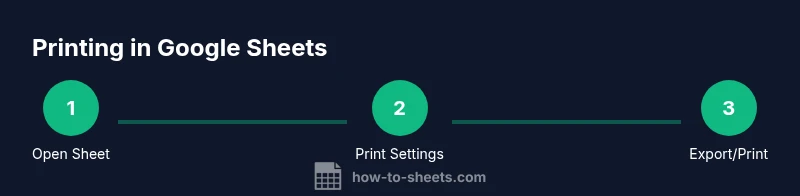
Steps
Estimated time: 15-25 minutes
- 1
Open the target Google Sheets file
Launch Google Sheets and open the specific document you plan to print. Review the data, tidy up any extraneous columns, and decide which sections need to appear on the printed pages. This preparation reduces last-minute surprises when page breaks occur.
Tip: Do a quick data cleanup and note any sections that require separate printing. - 2
Select the print range or content
In Sheets, press File > Print (or Ctrl/Cmd+P). Choose whether to print the Current sheet, the Entire workbook, or a Selected range. If you only need a portion, select the cells first, then print with Selected range. This keeps your output focused and avoids wasted pages.
Tip: For multi-block sheets, selecting a range helps maintain consistent formatting. - 3
Configure orientation, margins, and scaling
In the print sidebar, pick Portrait or Landscape based on content width. Set margins to Normal or Narrow, and apply Scaling: Fit to width or Fit to page. Preview the result to ensure all data is legible and not crammed.
Tip: Prefer landscape for wide tables, and avoid aggressive scaling that reduces readability. - 4
Set headers, footers, and repeating rows
Toggle Headers & footers and decide what to include (page numbers, document title, date). If your sheet has header rows, enable repeating rows so they appear on every printed page. This keeps context consistent across pages.
Tip: Repeat the top header row to help readers track columns on multi-page prints. - 5
Preview, print, or export as PDF
Use the print preview to verify layout, then print or select 'Save as PDF' to generate a shareable file. If the output will be shared with others, test a PDF export first to confirm margins and alignment.
Tip: Save a test PDF with a single page to confirm any layout adjustments before exporting the full document. - 6
Save a reusable print setup
If you print this sheet regularly, duplicate the file and store a copy with a descriptive name. Keep a note about the chosen print settings in the template to reuse the exact configuration later.
Tip: Document the print settings in a dedicated notes section on the template for quick reference.
FAQ
What is the google sheets printable view?
The google sheets printable view is the print-ready rendering of your data. It determines what prints, how wide content is, where page breaks occur, and how headers appear across pages.
The printable view is the print-ready version of your sheet, controlling what and how you print.
Can I print only selected cells in Google Sheets?
Yes. Select the cells you want to print, then use File > Print and choose 'Selected range.' This keeps outputs focused on the data you need.
Yes, you can print only the selected cells by choosing the selected range in the print dialog.
How do I repeat header rows on every printed page in Google Sheets?
In the print settings, enable Headers & footers and configure repeating rows so the top header appears on each page. This maintains context when your data spans multiple pages.
Enable repeating header rows in print settings so headers appear on every page.
What should I do if the printout is cut off on the right side?
Switch to Landscape orientation or adjust the scale to Fit to width. Narrow margins can also help, but verify with a quick preview before printing.
If content is cut off, try landscape orientation or adjust scaling, then preview again.
Is it possible to print multiple sheets in a single PDF?
Yes. Print each sheet separately with consistent settings, then combine the PDFs using a tool of your choice. This keeps each sheet readable while preserving formatting.
You can print each sheet to PDF and combine them later for a single file.
How can I print without gridlines?
In the print dialog, toggle Gridlines off. This results in a cleaner print, especially when gridlines aren’t necessary for readability.
Turn gridlines off in the print settings for a cleaner output.
Watch Video
The Essentials
- Define the print range before printing.
- Use appropriate scaling to keep content legible.
- Repeat header rows for multi-page prints.
- Export to PDF for sharing when printing is not possible.