Google Sheets 12-Month Calendar: Build a Year-Long Planner
Learn to build a reusable Google Sheets 12-month calendar with a year-long grid, month blocks, and date formulas for planning, budgeting, and project timelines.

According to How To Sheets, you can build a reusable Google Sheets 12-month calendar by creating a year-long grid, month blocks, and date formulas. This quick guide outlines the essential steps, template setup, and practical tips for tracking events, holidays, and deadlines across the year in Sheets for planners of all kinds.
What is a Google Sheets 12-Month Calendar and Why Use It
A Google Sheets 12-month calendar is a year-long planner built inside a single workbook. It covers January through December in a clear grid, with one row or column dedicated to each day. The beauty of this approach is that you can customize the layout to fit your workflow—whether you’re a student tracking assignments, a professional managing project deadlines, or a small business owner outlining seasonal campaigns. With basic date formulas, you can auto-fill days, connect events to specific months, and generate totals or summaries without duplicating effort. The How To Sheets team emphasizes practical templates that stay flexible across different years, allowing you to copy and reuse the same structure year after year. By starting with a simple grid and gradually layering months, events, and notes, you gain a powerful planning tool that scales with your needs while remaining easy to audit and share with teammates.
Throughout this guide, we’ll emphasize a lean, repeatable setup that keeps formatting consistent and reduces repetitive work, so you can focus on actions and outcomes rather than repetitive data entry.
Core Components of a Year-Long Calendar Template
A robust 12-month calendar in Google Sheets has several essential components. First, a year-long grid that spans all 12 months, either horizontally across a single sheet or vertically across multiple tabs. Second, a month labeling system and a consistent day-grid aligned with the week start (Sunday or Monday, depending on your locale). Third, a dedicated area for events, reminders, and notes, with data validation to ensure uniform entry. Fourth, a summary or KPI row to track counts like total events per month or completed tasks. Finally, a reusable template structure that can be copied for future years. The How To Sheets approach favors clarity and consistency, so every month follows the same pattern and formulas can be copied across months without modification. When you adopt this architecture, you unlock reliable planning, quick reporting, and straightforward sharing with colleagues.
Keep your template lean at first and expand only after validating that the core calendar works as intended.
Designing the Year Grid: Layout, Months, and Week Alignment
Layout choice matters for readability and usability. A common approach is a two-dimensional grid with months along the top and days of the month along the side, or vice versa. A year-forward layout emphasizes a single sheet where each month is a block, making it easy to compare month-to-month progress. The decision should reflect how you plan to use the calendar: if you need daily detail, a dense grid works; if you want a compact overview, smaller cells with month tabs may be better. Consistency is key—use the same column widths, font sizes, and color coding across all months so the eye can scan quickly. When you align weeks with a common start day, sorting and filtering become straightforward, and conditional formatting can highlight weekends, holidays, and important deadlines. In this method, the calendar becomes a reliable backbone for scheduling, not just a pretty sheet.
As you design, test with a sample year to confirm that the grid remains legible as you scale up, and remember to keep accessibility in mind for readability.
Core Formulas and Data Validation for Consistency
Date automation is the backbone of a Google Sheets 12-month calendar. Core functions like DATE, EDATE, and EOMONTH can generate month starts, while TEXT formats dates for display. Use IF or IFS to categorize days as work days, weekends, or holidays, and leverage VLOOKUP or INDEX-MATCH to pull in event details from a separate events table. Data validation keeps data entry clean: restrict the event column to predefined categories, limit notes to a reasonable length, and enforce consistent date formats. Named ranges simplify formulas and reduce errors when you move between years. For example, you can define a named range for each month’s day grid and reuse the same formulas to auto-fill dates when a new year is copied into the template. The result is a calendar that auto-updates with year changes and remains reliable for analysis.
To maintain accuracy, test formulas with edge cases—months with 28, 29, 30, or 31 days—and review the results for any off-by-one issues.
Templates, Variants, and How to Reuse Across Projects
A well-built Google Sheets 12-month calendar becomes a template you can reuse for multiple projects or cohorts. Start by saving the finished sheet as a template file, then create a dedicated yearly copy (e.g., 2026-Calendar) with the year label dynamic. For different teams or clients, clone the template and tailor the event categories, colors, and holidays. Consider creating separate tabs for different views: a yearly overview, a per-month breakdown, and a printable summary. You can also attach a lightweight data-entry form to the calendar so team members can submit events without editing the core grid. The key is to keep the template modular: use labeled ranges, consistent data validation rules, and color schemes that scale across years. How To Sheets’s approach favors templates that are easy to adapt, share, and audit—empowering you to run multiple calendars without starting from scratch each time.
Authority sources and Learning Resources
To deepen your understanding of calendar design and date-handling in Google Sheets, consider these reputable sources. These links provide fundamental guidance on data validation, date functions, and template best practices. NCES (National Center for Education Statistics) offers educational data concepts that can inspire calendar layouts for academic planning: https://nces.ed.gov/. NIST (National Institute of Standards and Technology) provides standards and references for date handling and formatting: https://www.nist.gov/. For broader context and practical templates, you can consult major publications like Harvard Business Review: https://hbr.org/. These resources support a solid foundation for building reliable, scalable calendars that work in real-world workflows.
Troubleshooting Common Issues and Best Practices
Even the best template can stumble if you rush changes or skip testing. Common issues include misaligned day grids, inconsistent date formats, and formulas that break when a new year is copied. To avoid these problems, lock critical cells that drive formulas, use named ranges instead of hard-coded addresses, and validate entries with dropdown menus. Regularly test per-month sections by changing the year in a single cell designed to refresh the grid, then verify that all days align with the correct weekdays. Finally, document your template with a short note on the intended year range, the data validation rules, and where event data is stored. By following these practices, you’ll maintain a calendar that’s dependable, scalable, and easy to hand off to others.
Tools & Materials
- Laptop or computer with internet access(Google account signed in to access Google Sheets)
- Google Sheets(Pre-installed in Google Drive; ensure you have editing permissions)
- Calendar template skeleton (12-month layout)(Either provided by your team or created in this guide)
- Date formulas reference (DATE, EDATE, EOMONTH)(Familiarize with core date functions)
- Events table or sheet(Store event details linked to the calendar grid)
- Printer or printable view (optional)(For offline planning or reviews)
Steps
Estimated time: 90-120 minutes
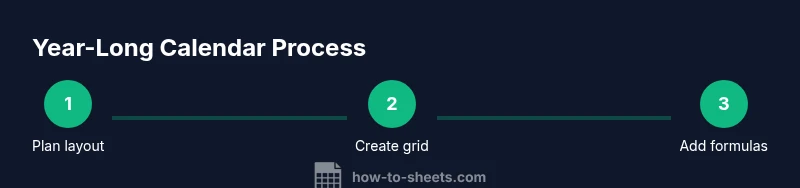
- 1
Set up the calendar scaffold
Open a new Google Sheets file and create a dedicated sheet named 'Year Calendar'. Define a consistent grid structure with 12 monthly blocks or a horizontal year-wide grid. Establish header rows for months and days to set expectations for data entry.
Tip: Plan the layout on paper first, then translate to Sheets to minimize rearrangements. - 2
Create the year grid and month labels
Decide between a vertical months-on-left layout or a horizontal year-long row. Enter month labels in a single row or column, and reserve a row/column for weekday headers. Ensure each month block has identical cell sizes for readability.
Tip: Use alternating month colors to improve scan-ability without compromising print quality. - 3
Populate date series using formulas
Use DATE(year, month, day) combined with EOMONTH to generate start dates for each month. Fill the day grid using a dynamic formula so that February’s days adjust automatically for leap years. Copy formulas across the 12 months.
Tip: Avoid hard-coding year values; reference a single year cell to switch years quickly. - 4
Add event data structure and validation
Create an events sheet with columns for date, category, and description. Link the calendar days to events via VLOOKUP or INDEX-MATCH. Apply data validation to restrict categories and maintain consistent input.
Tip: Use a small set of categories and color-code them for quick visual cues. - 5
Apply conditional formatting for clarity
Highlight weekends, holidays, and due dates with conditional formatting rules. This makes the calendar instantly scannable and helps you spot high-priority days at a glance.
Tip: Test rules with different year data to confirm stability across years. - 6
Test, save as template, and share
Enter sample data for a full year, verify all formulas are robust, then save the sheet as a template. Share with teammates, and consider protecting core formulas while allowing event entry in the events sheet.
Tip: Document the workflow and update notes so others can reuse the template.
FAQ
What is a Google Sheets 12-month calendar?
A Google Sheets 12-month calendar is a year-long planner built within Sheets, spanning all days from January to December. It uses a consistent grid and formulas to automate dates and track events. This template can be reused annually with minimal edits.
A Google Sheets 12-month calendar is a year-long planner in Sheets that uses a consistent grid and formulas to automate dates and track events. It’s reusable year after year.
Can I customize holidays and events?
Yes. You can add a separate events sheet and link it to the calendar days. Use data validation to standardize categories and colors, and update holidays as needed for each year.
Yes, you can customize holidays and events by linking an events sheet and using standardized categories.
How do I update the calendar for a new year?
Copy the existing template to a new year, update the year cell, and ensure all date formulas reference the year cell. Validate that day grids align with weekdays for the new year.
To update for a new year, copy the template, update the year, and verify the dates align with weekdays.
Is there an offline version?
You can print a static view or export as a PDF for offline planning. The live Sheets version remains online, but a printed copy can serve as a reference during meetings.
You can print a static view or export to PDF for offline planning, while the live Sheets version stays online.
How can I share and protect the calendar?
Share the calendar with teammates and restrict editing on formulas by protecting cells. Allow edits only in the events input area to maintain the integrity of the grid.
Share the calendar and protect the formulas; allow edits only in the events area.
Which formulas are essential for automatic dates?
Key formulas include DATE, EDATE, EOMONTH, and INDEX/MATCH or VLOOKUP for linking events. These keep dates accurate across months and years with minimal manual updates.
Essential formulas are DATE, EDATE, EOMONTH, and INDEX/MATCH or VLOOKUP for linking events.
Watch Video
The Essentials
- Plan the layout first and keep it consistent
- Use date formulas to auto-fill days across 12 months
- Leverage named ranges for maintainability
- Save as a reusable template for future years