Google Sheets 52 Week Calendar Template: A Practical Guide
Learn how to build and customize a Google Sheets 52-week calendar template to plan projects, track milestones, and visualize timelines across a year with practical steps and tips.

Goal: build a reusable Google Sheets 52-week calendar template that tracks projects, deadlines, and milestones across the year. You’ll set up a year-wide grid, create week labels, and add dynamic formulas to auto-fill dates. The template adapts to student schedules, team projects, or personal planning with simple customization. It uses simple data validation, conditional formatting, and optional weekly summaries to keep you on track.
Why a 52-Week Calendar Matters
A 52-week calendar provides a single, year-wide view that helps you align long-term goals with weekly actions. For students, professionals, and small business owners, this approach reduces scattered notes and missed deadlines by consolidating timelines, milestones, and review dates into one reliable canvas. According to How To Sheets, starting with a year-long calendar encourages consistent planning habits and minimizes last-minute rushes. The How To Sheets team found that teams that adopt a uniform calendar structure experience clearer priorities and better cross-functional coordination. In practice, you’ll see how week-by-week planning translates into steady progress, fewer budget surprises, and improved accountability. This template is intentionally flexible so you can tailor headers, milestones, and ownership to your context, whether you’re tracking coursework, product launches, or quarterly initiatives.
Designing the Year Grid: Weeks, Dates, and Labels
Start by laying out 52 rows (one per week) and a small set of columns to capture the essentials: Week, Start Date, End Date, Week Number, Month, Milestone, Owner, Status, and Notes. Use ISO week conventions (Monday as the first day of the week) to keep weeks aligned across months. Label each row with Week 1 through Week 52 and populate Start Date with a simple date calculation. Consistent labeling minimizes ambiguity when you share the sheet with teammates or instructors. How To Sheets Analysis, 2026 notes that practitioners who begin with a clear, labeled grid report faster onboarding and fewer miscommunications when calendars span multiple teams. As you build, consider adding a Year/Month header area that can drive quick filters and summaries. This upfront design reduces friction later in the project lifecycle and makes it easy to export or print for meetings.
Structuring the Template: Core Columns and Data
The core structure includes: Week, Start Date, End Date, Week Number, Milestone/Task, Owner, Status, Priority, and Notes. Add a data validation rule for Status (e.g., Not Started, In Progress, On Hold, Completed) to maintain consistency, and a separate rule for Priority (Low, Medium, High). If you’re coordinating with a team, an Owner column helps distribute accountability. You can also include a 'Hours' column to track estimated effort and a 'Progress' column with a simple 0–100% indicator. With well-chosen columns, you’ll be able to filter by week, milestone due date, or owner, keeping everyone aligned throughout the year.
Automations: Formulas to Auto-Fill and Track Progress
Use a year reference in a dedicated cell (e.g., A1) to drive the calendar. For Week Start Dates, you can use a formula like: StartDate for Week 1: =DATE($A$1,1,1) - WEEKDAY(DATE($A$1,1,1),2) + 1; Week Start for Week n: =DATE($A$1,1,1) - WEEKDAY(DATE($A$1,1,1),2) + 1 + (ROW()-2)*7. EndDate can be StartDate + 6. Week Number can be computed with =WEEKNUM(StartDate,2). To flag the current week, use a helper column with a formula like =AND(TODAY()>=StartDate, TODAY()<=EndDate). These formulas keep the grid accurate as you navigate through the year and ensure consistency when the year changes.
Visual Aids: Conditional Formatting and Dashboards
Apply conditional formatting to highlight the current week, upcoming milestones, or overdue tasks. Create a lightweight dashboard area that lists upcoming milestones for the next 4 weeks and uses sparklines to show weekly progress. A small summary card can show totals like weeks with at least one milestone, weeks with completed milestones, and weeks with high-priority items. Build these visuals directly in the same sheet or in a separate tab to keep the calendar clean and readable. This combination of formatting and dashboards makes it easy to scan status at a glance during status meetings.
Real-Life Scenarios: Education, Small Business, Personal Projects
Education: Plan a semester with weekly assignments and exam milestones. Use color codes to distinguish quizzes, essays, and labs, and assign each item to a teacher or student asOwner. Small Business: Map product development phases, marketing campaigns, and quarterly reviews. Link milestones to budgets and resource availability, and track execution across sprints. Personal Projects: Schedule a year of family events, fitness goals, and hobby milestones. The calendar helps you allocate time, reflect on progress, and celebrate completion as you reach each milestone.
Final Checks and Saving as a Template
Before saving, test the calendar with sample data for a full year (e.g., 2026) to verify date calculations, filters, and conditional formatting. Save the sheet as a reusable template in Google Drive or export it as an Excel-friendly file for teammates who prefer Excel. If you’ll share it with others, protect key headers and locked cells to prevent accidental edits, and consider a separate hidden tab for formulas that should not be modified. The How To Sheets team recommends documenting the data definitions and any customization steps in a short guide so new collaborators can onboard quickly.
Tools & Materials
- Google account with Google Sheets access(Needed to create and save the template in Google Drive)
- New Google Sheet or copy of a 52-week calendar template(Base sheet to customize for your year)
- Date reference cell (e.g., year in A1)(Drives auto-fill formulas across weeks)
- Basic formulas knowledge (WEEKNUM, DATE, IF, SUM)(Enables dynamic calculations and summaries)
- Conditional formatting palette (optional)(Improves readability by highlighting weeks, current status, or milestones)
- Data validation rules (optional)(Keeps Status and Priority entries consistent)
Steps
Estimated time: 60-90 minutes
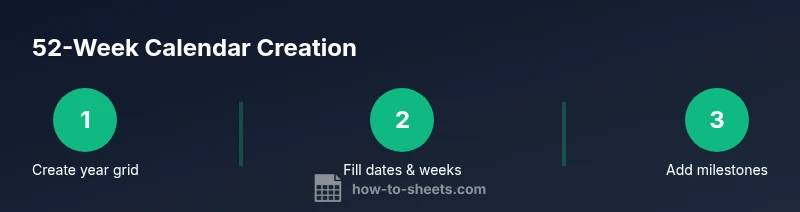
- 1
Create the year grid
Set up 52 rows representing weeks and add basic columns for Start Date, End Date, Week Number, and Milestone. Establish a year cell (e.g., A1) to drive date calculations. This creates a stable backbone for the entire calendar.
Tip: Lock the header row to prevent accidental edits while you're entering data. - 2
Label weeks and dates
Fill Week 1 with a Start Date based on the year reference, then use a formula to fill subsequent weeks automatically. Ensure Week 1 starts on Monday if you follow ISO week standards. Verify that End Date is Start Date plus 6 days for each row.
Tip: Use ISO week numbers to keep consistency across months. - 3
Set up core data columns
Create Milestone/Task, Owner, Status, Priority, and Notes columns. Apply data validation to Status and Priority so inputs stay uniform across weeks. This reduces ambiguity when filtering or reporting.
Tip: NameOwner with initials if multiple teammates are involved to save space. - 4
Add formulas for automation
Implement formulas for Start Date (Week 1 and subsequent weeks), End Date, and Week Number. Add a helper column to detect the current week with TODAY(). This keeps the calendar accurate as the year progresses.
Tip: Test formulas with a fake year before applying to your real data. - 5
Apply visuals and conditional formatting
Highlight the current week and upcoming milestones with color rules. Create a small dashboard area showing upcoming tasks for the next 4 weeks. Use sparklines to visualize weekly progress.
Tip: Keep color choices accessible; ensure high contrast has good readability. - 6
Test and save as a template
Run through a full year with mock milestones to ensure everything calculates correctly. Then save as a template in Google Drive or export for teammates. Document any customization steps for future users.
Tip: Document assumptions about year start and week start conventions for future years.
FAQ
How do I set up a 52-week calendar in Google Sheets?
Start by creating a 52-row grid with columns for Start Date, End Date, Week Number, Milestone, Owner, Status, and Notes. Use a year reference to drive date calculations and apply basic data validation for consistent inputs. Add conditional formatting to highlight the current week and upcoming milestones.
First, create a 52-row grid with your key columns, link it to a year cell, and apply simple validation and formatting to keep things consistent.
Can I customize weeks to start on any date?
Yes. Set a year reference cell and adjust your Start Date formula to align the first week with your chosen start date. If you follow ISO weeks, start Monday; otherwise, adjust to your preferred weekday.
Absolutely. Change the year reference and adjust the start date logic to match your preferred week start.
How can I auto-fill weeks when the year changes?
Use a base formula for Week 1 Start Date, then copy it down with a 7-day increment for each subsequent week. End Date is Start Date plus 6 days, and Week Number updates automatically with WEEKNUM.
Copy the week-start formula down to cover all 52 weeks, and let WEEKNUM and End Date update automatically.
What are common mistakes to avoid with weekly calendars?
Treating weeks as loose labels without consistent dates, skipping data validation, and overloading a single sheet with too many details. Keep a clean structure and separate dashboards for summaries.
Avoid inconsistent dates, skip validation, and overcrowding the sheet; keep a clean core grid with a separate summary area.
Is a 52-week calendar template suitable for project management?
Yes. It provides a year-long perspective, helping you align milestones, owners, and dependencies. You can integrate it with budgets, risk logs, and dashboards for a fuller project view.
Definitely—it's great for coordinating annual milestones, tasks, and owners and can tie into budgets and dashboards.
Watch Video
The Essentials
- Define a clear, year-long grid with 52 weeks
- Label weeks and dates consistently to avoid confusion
- Use formulas to auto-fill dates and compute week numbers
- Apply conditional formatting for quick status checks
- Save as a reusable template for future years